He tends his flock like a shepherd: He gathers the lambs in his arms and carries them close to his heart;
he gently leads those that have young
. {Isaiah 40:11}

10 August 2012

Lost Your Phone?

If you're like me and have been ready to walk out the door to leave only to realize that you don't have your phone, you have no idea where it is, and have no way to call it...
I found a solution!
Where's my Cellphone is a website I used for the first time this morning.
You put in your cell number and it calls your phone directly.

**I know NOTHING about this site. I have NO IDEA if they try to sell you things or what they do with your cell phone number but what I CAN tell you is that in a pinch when you have to have your phone on hand, this is a great resource and that I'll keep you posted on whether or not I suffer any ramifications from using it. This morning, I was glad to have it. 

Have a Great Weekend!

09 August 2012

Grab'n Go Breakfasts

And better yet, they're make ahead breakfasts you can feel good about!
I had Miss Mak help me with these this morning and since most of the measurements are large it was fairly easy. The fun part was using a potato masher to cream the bananas. Of course her favorite part was taste testing.

First up...
Peanut Butter Banana Oatmeal Squares
What You'll Need:

1 1/2 cups quick cooking oats
1/4 cup packed light brown sugar {I used rapadura)
1 teaspoon baking powder
1/2 teaspoon kosher salt
1 teaspoon ground cinnamon
1 teaspoon vanilla extract
1/2 cup milk
1 large egg, lightly beaten
1 large mashed banana
1/4 cup creamy peanut butter

What To Do:
Mix together the quick cooking oats, sugar, baking powder, kosher salt and ground cinnamon.
Add in the vanilla extract, milk and egg. Mix the ingredients together.
Then add in the mashed banana and peanut butter. Combine all of the ingredients.
Pour the mixture into a lightly greased 8 by 8 inch metal baking pan. Bake at 350 F degrees for 20 minutes.
Cut into squares and enjoy!
 

and since I already had half of the same ingredients out, I went ahead and made a batch of

Banana Oat Breakfast Cookies
 
What You'll Need:
1 tsp vanilla extract
1 tsp cinnamon (or more, to taste) 
1 cup unsweetened applesauce
1/3 cup raisins, or to taste
1 1/2 cups oatmeal, quick or old fashioned
2 ripe bananas, mashed with fork until creamy

What To Do:
Set oven to 350.
Mix first three ingredients in a large bowl. 
Add remaining ingredients and let sit for at least 10 minutes. {I used old fashioned oats so I let it sit for closer to 20.}
Drop cookie dough, by spoonfuls, onto a parchment paper lined cookie sheet & flatten cookies into rounds.
Bake approx. 30-35 minutes, or until golden & done.
Remove from oven & let rest on cookie sheet for 5 minutes, then move to cooling rack.
When completely cool store in a covered container.

06 August 2012

Oven Roasted Fruit

 
Oven Roasted Fruit
This recipe is heavily based on Ina Garten's recipe with just a couple minor changes. 

What You'll Need:
6 peaches, pitted and cut into quarters or eighths
6 plums or Italian prune plums, pitted and quartered or halved
2 cups fresh raspberries

What To Do:
Preheat oven to 450 degrees F. Place the peaches and plums snugly in a single layer, cut side up, in 2 glass or porcelain oven-proof baking dishes. Top with the raspberries. Bake for 20 to 25 minutes, until tender.
Heat the broiler and place the fruit about 5 inches below the heat and broil for 5 to 8 minutes, until the berries release some of their juices.
Remove from the broiler and serve warm, at room temperature, or chilled.
We put it over ice cream. Yumm-O!

**The only difference between this version and Ina's is that she adds 1/2 c sugar to the fruit before baking and when it's all over, she adds 2 T orange juice to the berries before serving. 


03 August 2012

Beer Crockpot Chicken

Made this and loved it. That's all I'm gonna say.

Beer Crockpot Chicken
by Morgan from My Daily Dish

4-6 Chicken Breasts or 1 Whole or cut up Chicken
1 Can of any kind of Beer
1/2 tsp Garlic Powder
1/2 tsp Basil
1/2 tsp Paprika
1/2 tsp Black Pepper
1/2 tsp Kosher Salt
*You can use whatever spices you like
 

Put all ingredients into crockpot 
If frozen cook on high 4-5 hours or low 8-10 
If fresh cook on high 3-4 hrs or low 7-8 hours if fresh

02 August 2012

Outdoor Chalkboard

Just a teeny bit of background before we begin today.
Hubs and I determined when we were looking for a house a couple of years ago that 1. we were going to take a stab at homeschooling starting in kindergarten with all the kids 2. because of this, we wanted our home to be a fun place that the kids could explore in and wanted to be at and 3. we want our home to be a place where not only our kids want to be but their friends want to hang out because, quite frankly, we're those weird parents who like to keep tabs on our children.

Okay... so with that in mind, I made an outdoor chalkboard. This was a bit more our of necessity than anything since I bought the kids sidewalk chalk for the backyard and it ended up being more like "house chalk" and "toy chalk"...
{courtesy o' Miss Mak}
I had plenty of leftover chalkboard paint from my chalk wall at the old house so this was pretty simple to do. 
and 3 - 1"x3"x8" pine boards for the frame and support.

What You'll Need:
- large board for background, cut to the size you'd like {I bought a 4'x4' piece of underlay at Home Depot
- 1"x3"x8" pine boards for frame and back supports. How many will depend on how big your board is. For our 4x4 board I bought 4 of these boards. 
- chalboard paint
- paint for frame (if painting and framing)
- foam roller and paint tray (foam gives a smoother finish. use what you've got on hand)
- strong tape (handy, but not necessary)
- miter saw/ miter box for frame corners
- screws
 
What To Do:

Roll several coats of chalkboard paint onto your board being sure to let dry in between coats. I believe I ended up with about 4 coats on this guy.
Roll or spray your 1"x3"x8" frame boards being sure to let dry between coats. I believe this took three coats.
Once frame pieces are dry, to length and miter the corners to 45 degree angles using miter saw or miter box.

Don't forget to condition the board which basically means to color all over it and then wipe it clean with a dry cloth.I'm not sure exactly why you do this but I believe it has something to do with keeping it from permanently saving the first picture you drew on it. Just a guess.
Once your board is dry, put all your frame pieces around its edges and tape in place. You're not screwing them in yet so the tape holds everything while you continue to work with it.
Flip your board face-down.

Using 1"x3"x8" boards cut to the length of your board, lay the support pieces down. {I tried a few configurations to figure out how to get the best support since our board would just be leaning up against the wall and I didn't want it to sag or bow. I ended up using 4 boards. Two on the ends and two in the middle.}
Screw boards into place being sure to put weight around the edges as you work so that the screws really grab the frame pieces up front.
If you don't screw well, like I didn't in a couple spots, you can put more screws in on the frame side but you risk splitting the wood like I started to here. Nothing a little touch up paint can't fix, I guess. 
Finally, I added a hook that I had in my toolbox and a bucket I got from the dollar section at Target not long ago and that's where we store the chalk and cloth to wipe the board.


01 August 2012

Sun Tea

Posting about drying clothes outside got me thinking about my Gram's house where I always saw towels and sheets slowly rippling in the gentle breeze of summer. In that very same picture I recall a big jug of sun tea brewing on a bench.
What a beautiful memory!
So I decided to relive it and make my own.
My mother in law still makes it each summer in a gallon sized pickle jar (well washed, no worries) and she adds mint in for added flavor. It's delicious and I often selfishly drink most of the gallon all by myself.
Either way, if you've not tried it yet well then... quite simply... you should. 

What You'll Need:
a glass pitcher, jug, or jar (I don't recommend heating plastic so I always use glass)
a cover of some sort to keep the bees out
sugar (added in 1/4 c increments)
10 tea bags
a bunch of fresh mint leaves

What To Do:
Fill your pitcher 90% of the way with water.
Add the tea bags (to keep from having to collect stray bags, tie the strings of all the bags together so you can pull them out at once).
Cover with lid.
Place in direct sunlight.
The timing will vary based on how strong you like your tea and how hot the sun is that day.
I place ours on our grill which has a black cover so the sun was drawn in and it only took about an hour to steep the way I wanted it.
While tea is still warm, add sugar in 1/4 c increments and stir, keep doing this until you get your desired sweetness. (Mine took only 1/2 a cup).
If adding mint leaves... tear leaves off stem, add about a handful to the tea and stir. Recover= and place back in the sun until the flavors have melded the way you like them. This was only another 30 minutes for me on a very sunny day.
Refrigerate to cool and serve.

30 July 2012

Two Summer Money Saving Tips

These two tips may be considered old news but just because they're old doesn't mean they aren't good. 

1. Sun drying your clothes. 
Our grandmothers did it, our mothers may or may not have done it, and by golly, we should too!
Why? It's FREE! Who doesn't love that?!
{Well, for the sake of full disclosure, if you don't have a clothes line, a drying rack, or a sunny spot of deck railing, it may cost a little but it's a one time cost which is good too!}

Currently, as I wait for the posts sitting in our garage to be transformed into a clothesline in the hands of master carpenter Hubs, I have resorted to the deck and a stand alone drying rack I got from Target.
The upsides: Low/No cost. Clothes smell wonderful! Saving electricity therefore saving money. Get in touch with your ancestors. The sun has natural bleaching and germ killing abilities. Drying has been just about as quick as the conventional dryer for me so far, that includes towels **.
The downsides: Rainy days happen. There isn't always enough room for all the loads. Risk of bird droppings which I have avoided thus far. 
**Many people consider crunchy towels and stiff jeans as a downside but that can be easily avoided by tossing the them all in the dryer for a few minutes once the sun has gotten them about 80% dry.

2. Save money while using your central air. 
If you're like me and love fresh air stirring around the house every once in a while, this tip is a big help. Let's say you keep your house around 73 for the daytime, go ahead and set it for that in the morning and then, if it's not super hot out in the morning go ahead and open all your windows and let the breezes flow. Yes... keep your A/C on with the windows open! Once the air begins to warm up, usually around 11 for us here in New England, the A/C will kick on and that's when you go ahead and shut all the windows and curtains up. This way everybody wins! You get your fresh air while your A/C unit gets a break and doesn't have to work so hard to get the house cool again.

That's all for today.
Happy Monday!

27 July 2012

Favorite Last Minute Marinade

I first found this recipe on SkinnyTaste.com as a grilled chicken salad.
Well Hubs and I fell in love with the recipe for the chicken. I love it because it's so stinkin' easy. He loves it because I serve it to him.
I'll get right to the good part...

What You'll Need: 
2 T fresh squeezed lemon juice (bottled is acceptable but I ALWAYS prefer fresh)
1 t dried oregano
1 t crushed garlic (fresh is always best, again, but I've used dried in a pinch)
salt to taste
black pepper to taste

What To Do:
I usually slice3-4 boneless, skinless chicken breast halves and throw them in a bowl with all of the above ingredients and let it for about 30 minutes.We then throw the chicken into a grill pan on the grill and cook it through then let it rest for 10 minutes under some foil.

I usually double or triple this recipe and keep the cooled chicken in the fridge for fast lunches. This stuff is wonderful on a sandwiches, wraps, salads, or as a main dish. I often give the kids the chicken as their meal and Hubs and I have a salad with sunflower seeds, sprouts, and dried cranberries. I often use my favorite poppy seed salad dressing but it works great with just a squeeze of lemon and some olive oil too. It's all good!

**Marinating Tip:
If you have a Food Saver and are REALLY crunched for time, throw all the ingredients (including the chicken) in a canister and seal. Depending on the depth of flavor you want you can leave it sealed for about 5 minutes and be good to do.

25 July 2012

Life Binder Part 1

I'm just going to start by saying, "Paige drug me into this!"
Now that that's out of the way...
If you don't know what a life binder is I'll tell you that it is, in fact, a "Project of Epic Proportions" like my dear friend Laura {or Paige as I call her} warns it will be on her blog Our Portion.
{Isn't she gorgeous?!}
Anyway... If you want to skip through my progress and get right down to what Paige has going on you can find her info here...
Intro: What is a Home Management Binder?
Supplies
Contacts
Medical
Account Information
Budget & Bills

Paige offers a bunch of information on how she's building her folder as well as resources she found for free printables! What's not to love?!

I'll get to how my folder turned out once I am done because I can tell that I'm already going to be adding and making changes to what I've done. What I will say is that we have our fourth child on the way and getting organized isn't just for kicks anymore... IT'S A NECESSITY and though I have only just begun things have definitely been simplified around here. Be warned: It's a LOT of work on the front end but using it in the day-to-day has made an impact.

For the record, Paige and I are not the first to create these binders. The web is loaded with printables {free and for sale}and ideas to get the ball rolling and get you thinking about what will work for you.


Mandi from Finding Home shares her life binder with bunches of free printables
She's got great ideas ranging from meal planning to keeping track of birthdays to remembering movies you want to see!

A Bowl Full of Lemons has several great ideas and gives a rough overview of what she included plus a plethora of links to free and for sale printables.


Tiffany from The Nest Effect has made her own printables that are for sale or, at the very least, are good ideas to get you thinking.

Jen from IHeart Organizing also offers some really cute printables for her household binder along with smart ideas for how to keep yourself organized.

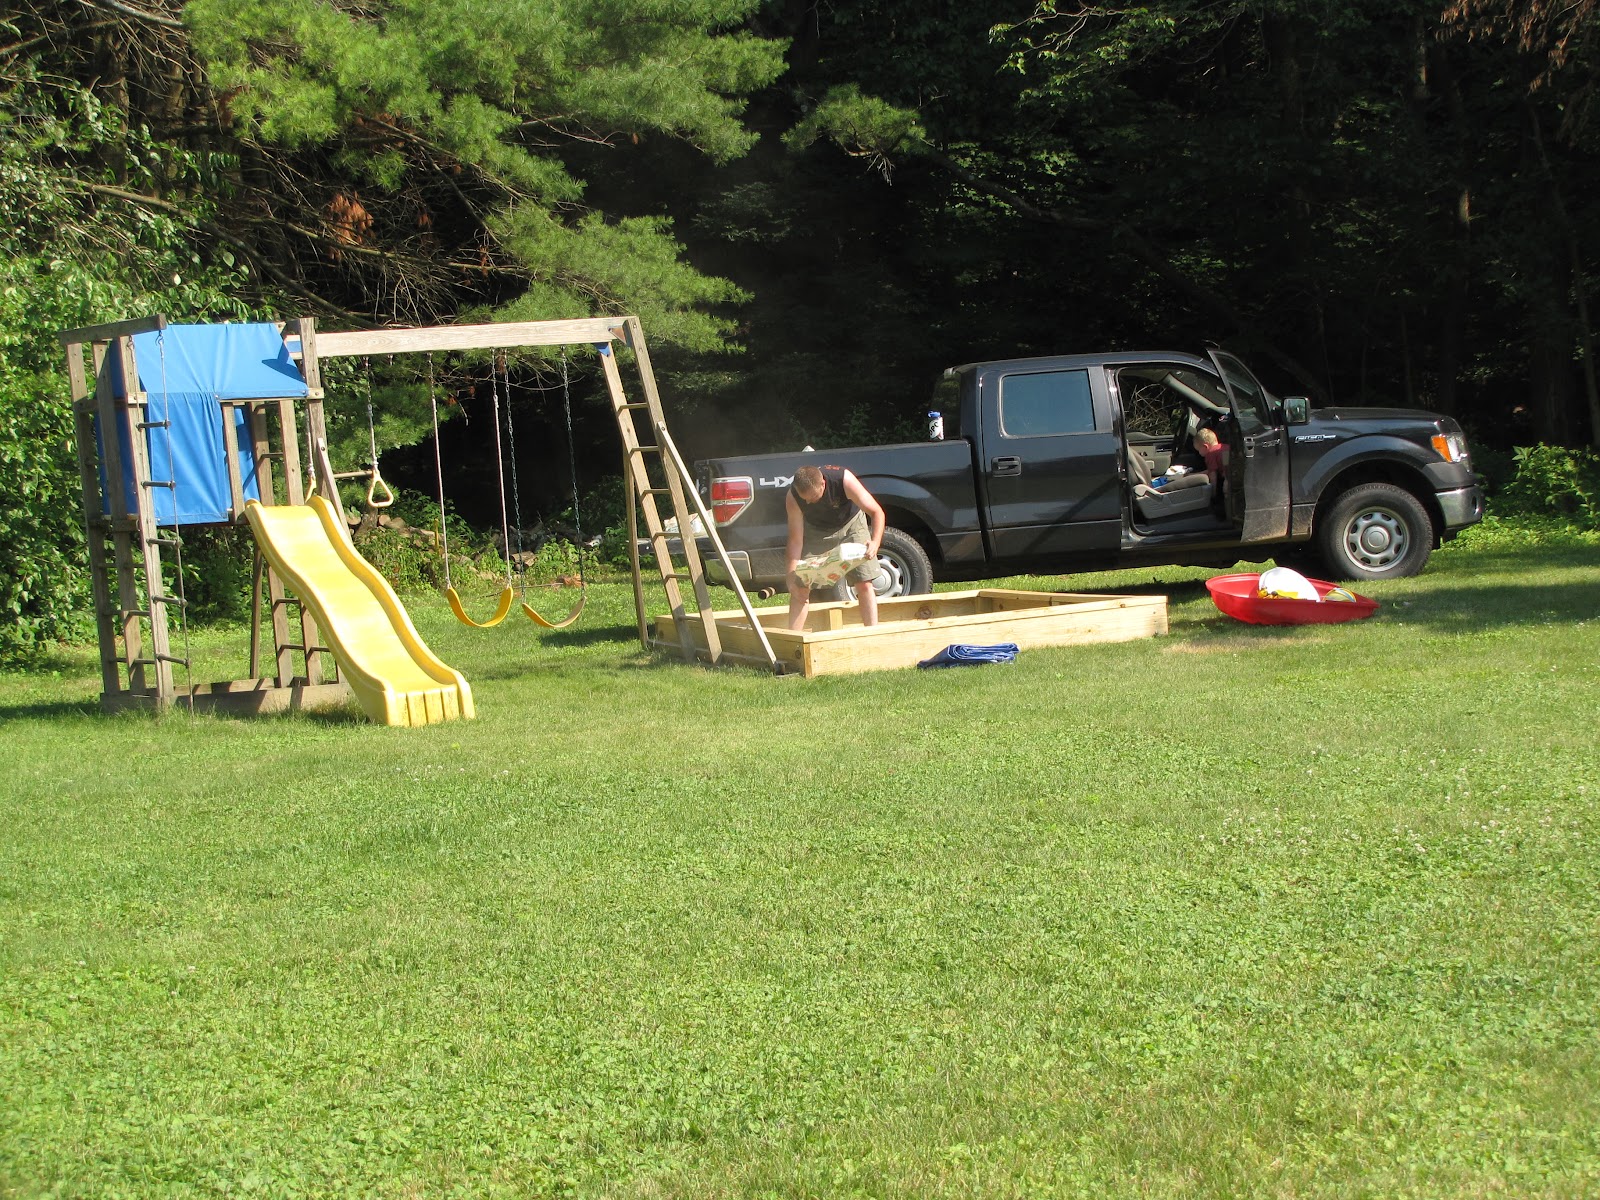
We Built a Sandbox!

Well...actually... he did.
 
As usual my overactive mind goes a little stir crazy and poor Hubs usually gets roped in.
<sigh>
Well... I'm certainly not complaining because another project was finished and I'm a happy camper.
And yes... Hubs is happy with this one too.
<whew!>

It's a roughly 8x8 box, I'm told that's big but with Baby J on the way we would like to be able to fit at least 4 kids in at a time and our little Step One crab just wasn't cutting it.

So here's what it took...
4 - 2" x 10 "x 8' - sides of box
4 - 2" x 6" x 10" - seat around top
1 - 4" x 4" x 8' - corner supports
12 - 4 1/2" {I think}Lag Screws - for screwing 2" x 10"s to 4" x 4"s
3" {I think} exterior screws - for screwing seat to sides of box 2" x 6" to 2" x 10"
I wasn't that purposeful about taking pictures... I realize that doesn't help things so I'm hoping this picture does the explaining for me. {Feel free to ask if you're totally lost.}
Before filling the box with sand we stapled landscaping cloth around the bottom of the box to keep the grass and weeds from growing up through.
The most expensive part was the sand so we put it off indefinitely. Thankfully, Opa had pity on his poor grandbabies and purchased the sand for them.
Bean helped...
CJ did not...

 We've fit 6 kids in at once so it definitely does the job!


24 July 2012

What We've Been Doing


We've been away for a while.
It's not really all that wise to announce on the interwebs that I'll be on vacation and my home is fair game for the week so I kept it a secret.
I often schedule posts so as not to allow anyone the chance to miss me desperately, as I'm sure you did, but I was just too dang tired before I left.
Please forgive the rudeness without announcement and be prepared to be amazed by what I have in store for you for the rest of the week...

- The sandbox is done!
- The chalkboard is in use!
- The "Project of Epic Proportions" has begun!
- The family has been fed somethin' yummy!


And just for kicks... here a few gratuitous pictures of the family you've missed so much over the past week... MINE! 


Happy Tuesday!

16 July 2012

Grilled Peaches and Berries


Here's What You'll Need:
3 peaches or nectarines   1 cup berries   2 T butter   1 T lemon juice   2 T brown sugar

Here's What To Do:
Set your grill to medium-low.
Lay your peach halves on a 12"x12" square of heavy duty or double up foil.
Pour berries over top.
Pour the remaining three ingredients over top and wrap the foil into a ball to seal the steam in.
Grill for about 18-20 minutes or until the peach is tender.
Carefully open and enjoy!
We served ours over vanilla ice cream. So good!
I found this recipes at Taste of Home

13 July 2012

Basement Bathroom Progress

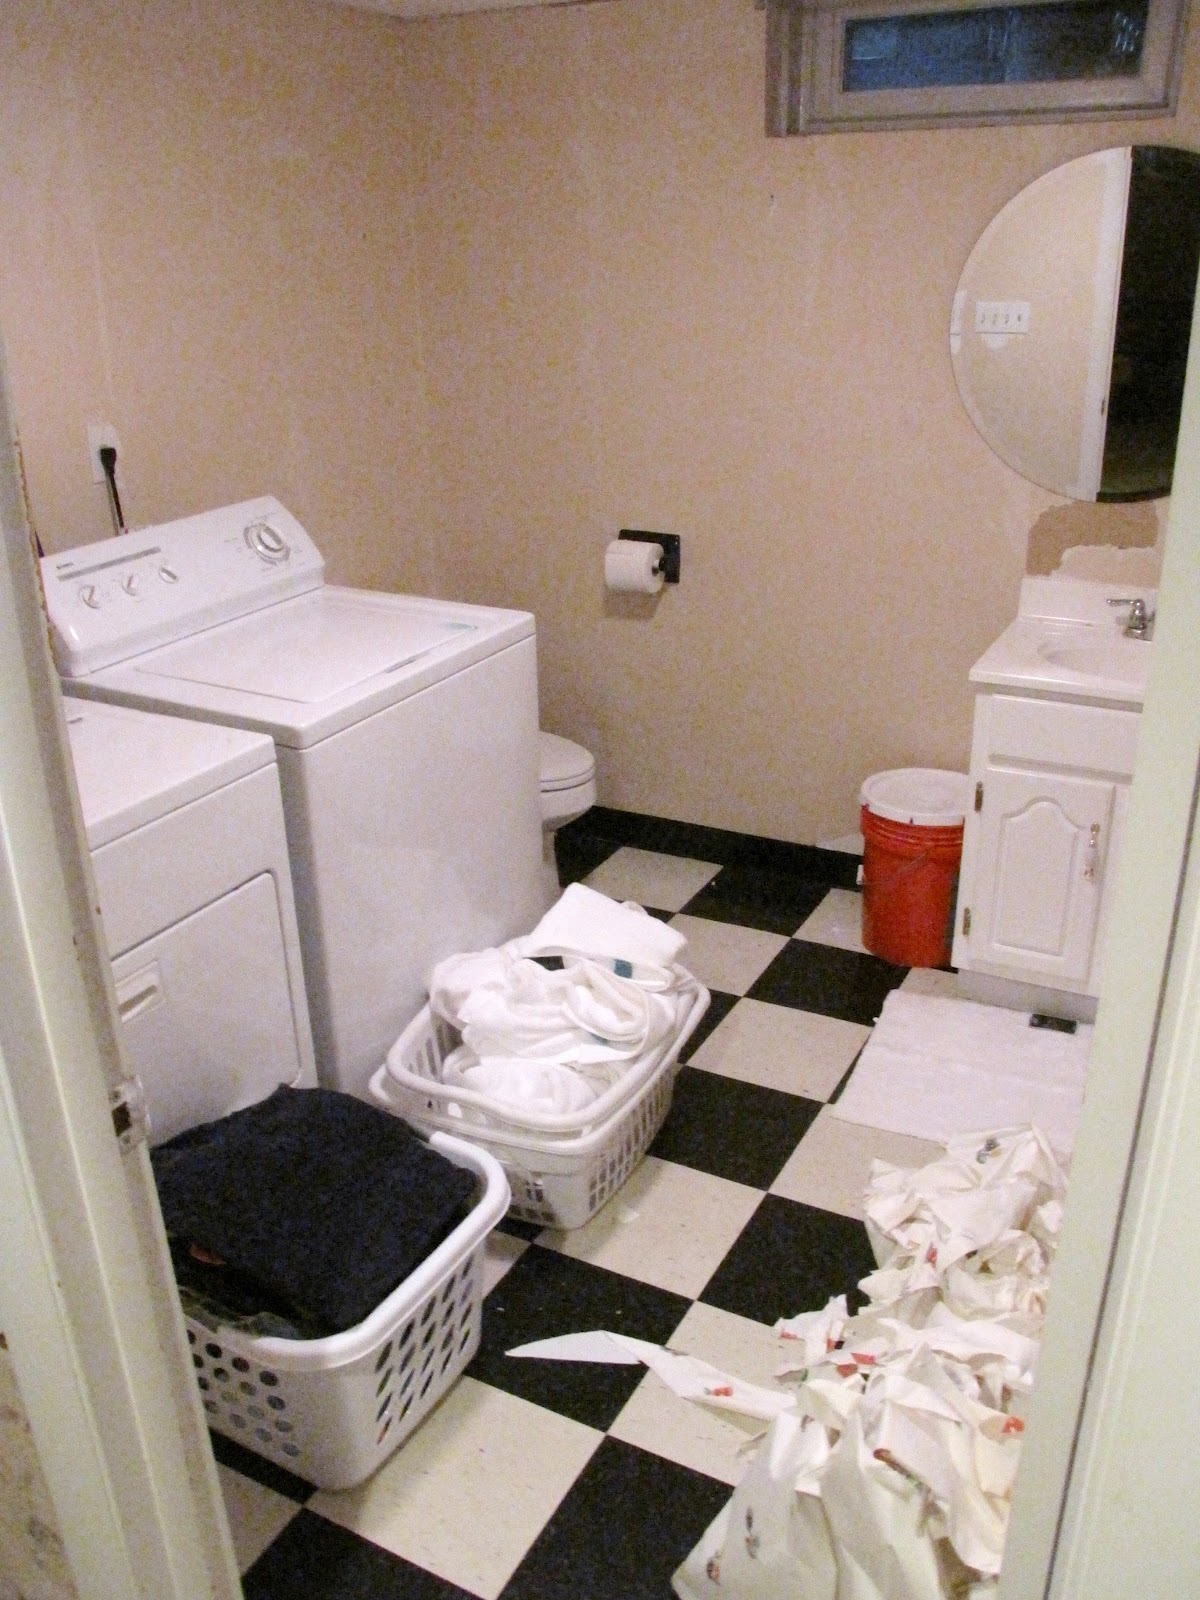
Nothing too fancy in the bathroom here, I just desperately wanted to be rid of the floral paper on the walls and to tone down the checkered floor a smidge. We're still working on this one but so far... 
Befores:
 
During (Round One): 
 

During (Second Wind):

And that's that!
Have a wonderful weekend!

LinkWithin

Related Posts with Thumbnails