He tends his flock like a shepherd: He gathers the lambs in his arms and carries them close to his heart;
he gently leads those that have young
. {Isaiah 40:11}

Showing posts with label Clean Living. Show all posts

05 September 2013

Becoming a Minimalist: Day 6

Today I wanted to fill you in on a little tip I read in Lorilee's book. The first thing that I shared from her that I loved was the recommendation to dream a little dream of what you wanted your life to be like. Your home. Your schedule. The second tip I loved and can't change is this... 
Just say "no" to storage! 
My gut reaction to this little nugget was "um, yeah... how do you expect me to be organized when I don't have anything to store it in?!" None the less, I got to cleaning and organizing and when I was done with round two of my decluttering I had actually emptied about a dozen clear plastic containers. And then it hit me... I have held on to so much of our "stuff" because it had a nice home tucked neatly inside these bins. Had I not had these bins, I would have been forced to decide whether or not I wanted to try and make a home for these things to begin with. So for me, storage containers just became a means to make my clutter easy on the eyes. That is not what I was aiming for. And so the storage bins are slowly disappearing. Hubs actually choked when he saw me shipping out some plastic bins I had hung on to for years and, from deep within his frugal soul, cried"but we could always use more storage!" This gave me the perfect opportunity to explain that if we don't have storage lying around we won't look for things to store and since we are trying to stop storing and start cleaning, this is a perfectly logical step.
He's a smart guy. He gets it. 
Now don't get me wrong... we have and enjoy some storage. We keep only a few toys in the kids rooms and those are gathered into a shallow bin slipped under the kids' beds. We also have Christmas decorations, clothes waiting to be worn by the younger siblings, and toys that aren't quite age appropriate yet. Those things are stored neatly in tubs in the basement. To be honest, I wish they weren't. I wish we could pare down to zero excess but alas, Hubs and I agree that it would be wasteful to put ourselves in a position to have to re-buy in the future so, for now, we wait.
So today is simple... once you empty a lovely, lid-ed storage container, give it away to someone who actually needs it and then... don't buy more! That stuff is not made from particularly environmentally friendly materials and is expensive anyway! 

For more minimizing tips, check this out.

15 August 2013

Becoming a Minimalist: Day 4

After yesterday's kitchen challenge I wanted to go easy on you because, whether you actually went through your cabinets or not, just reading about the challenge can be overwhelming.
That said, today is fairly simple.
Clear All Horizontal Surfaces
You may read that, take one look at your living room and giggle saying to yourself "Oh, that Krystle, she's adorable!"
Well, despite how cute you may find me, I am actually serious.


Do you remember that overwhelmed feeling I described not long ago? Well horizontal spaces speak directly to that feeling. I have always tried to have the house clean before bed and before I leave the house so that when I wake up or return home I do so to calm. Home is supposed to be a place or peace and restoration (and yes, many other things) but not a place of chaos and frustration. Your horizontal surfaces (table tops, counter tops, end tables, chair seats, and the like...) are the most obvious places I can think of that can either speak to simplicity and cleanliness or scream clutter and headaches.

I say this is step is simple because it repeats a process that I have suggested in previous posts...
1. Get a large box or plastic bin and place it in a central location of your home.
2. Pick a room to start in (mine was our bedroom).
3. Take ALL items off one surface (I started with my night stand.)
4. Place all piles of paper in one large pile in a central location and devote time to go through the entire pile, piece by piece, in the very near future (like while watching a light hearted movie with a cup of coffee).
5. Move everything that isn't absolutely necessary into the box.
6. Move to the next room, taking the box with you, and do the repeat steps 3,4,and 5.
7. Once your have gone through all of your rooms, hide the box. Be it in a guest room closet, a basement, and attic, just get it out of sight for one week.


If, after a week, you think your space looks a little plain, go ahead and add a bit of spice but keep it simple. 
...and "keeping it simple" doesn't mean clean lined, boring, and modern. It simply means "simple".
As with everything, there are a few exceptions...
What if I have a lot of essentials such as my kitchen counter tops?
You get to choose what is essential and non essential in your home. You may be thinking "it's all essential" and though it may be true for some, it is unlikely to be true for most. If it is a necessary item, it may not need to be out on display. The point here is create visual cleanliness. For instance, we had a coffee maker, a wire basket for fruits and veggies, a paper towel holder, a crock for wooden spoons and spatulas, and our family calendar on our kitchen counter at all times. I was only able to pair down by one thing, our cooking utensil crock, by placing all the items in a drawer next to the stove. I'm still trying to figure out a strategy for the rest of the items but for now, just one thing gone is still considered progress and that's what I'm trying to establish. I'm looking for a lifestyle change and a different mindset, not a specific formula for perfection.
What about family photos and heirlooms?  This again is your call but here is my word of encouragement... This exercise is intended to give you a break from your belongings and decide how you really feel about them so put them in the box anyway.
If you find that you can't make it more than a day without the item... it's probably an essential item and, by all means, pull it out. If you desperately miss an object while it's gone but don't necessarily need it, give yourself at least three days before you pull it out. If you find that you're able to make it a full week without thinking about a particular item, needing it, missing it, then after the week is up, consider donating it or giving it away. If it's a picture frame with a beloved picture consider enlarging the photo and placing it in a wall frame or maybe tuck it away in photo album.

Finally, when the week is over, if you find there are items you just cannot part with but don't need enough to put back in plain sight then I recommend one of two things. Either leave the items in a box out of sight for another three weeks and revisit it to see if you're ready to part with them then or designate another home, out of site, for that item. If it is something you just love... that makes you happy to see... I definitely recommend giving it an honored spot in your home. The goal is to simplify and make your home a place you love to be.
Home is where the heart is, after all!

Are you joining us late in the game? See what you missed HERE.

kitchen with wood island
bedroom pix

14 August 2013

Becoming A Minimalist: Day 3

This weekend we hosted a ginormous tag sale at our home. It was wonderful and exhausting all at the same time but I realize that a tag/garage/yard sale is all a bit premature at this point since we are still trying to collect all of our "things". So I'll save the story of our sale (and how you can throw your own) for a little further down the road...

Today I'd like to focus on something just about as daunting as organizing your very own tag sale. Today I encourage you to take a long hard look at your kitchen. dun, dun, duh.....
Tackling The Kitchen
This is a hard one for me. I have been through my kitchen several times and still have things I could part with. Hubs and I have taken the first steps of planning a full kitchen renovation and when it came to space planning I wanted to make sure a new layout would handle all of our kitchen doo-dads. I came to realize a few things....
1. Many of our kitchen accoutrements are single purpose items.
2. Many of the single purpose items are rarely, if ever, used.
3. I have several of the same items (cutting boards, for instance).
4. Like laundry, the more kitchen items I own, the more I use, and the more I clean.
5. It's easy to hide all of the excess behind the cabinet doors.

So those were my reasons for needing to go through again and again. Several sources have suggested that to figure out what you really need/like in your closet turn the hangers backwards and only switch them the right way if you actually wear the item. I suggest the same thing with your kitchen gadgets. I dumped them all into a box and put the box on top of the fridge. If I needed the item I would fish it out, use it, and place it in the best drawer for the job. If, over the course of 3 months, I didn't use the item the box went to the basement. If, over the course of 6 months they weren't used I either donated the item, gave it to a friend, or trashed it. (One caveat... if you live in New England and like lobster, keeping 6 or more crackers on hand is perfectly acceptable!)

A few simple and quick tips are...
- Go through your cabinets and toss anything that is broken or dangerous. A kitchen, by nature, has some hazards. Ditch all materials that aren't at their best.
- Analyze all your ingredients. If they are expired, pitch them. If you've changed your diet and you don't eat it any more, donate what you can and pitch the rest. If you always feel guilty after eating it (hello, Oreos) then share them or purge them. This is all about getting rid of the unnecessary, overwhelming, emotionally and spiriturally draining "stuff" in your life. It's time to be cold, calculated, and methodical.
- Empty your counter tops. - Okay, this one is rather difficult for me. Though I haven't cleared it completely, I have been able to downsize my counter-collection from what it once was by decluttering, reorganizing, and utilizing drawer space better. 
- On a daily basis, clean the kitchen. Load the dishwasher, run it, empty it, repeat. (My finger is wagging in my own face on this one!) I assure you that on the days I am able to get ahead on dishes and the counter top is clean, the heavens part and angels sing. It  is such a beautiful sight and is totally worth the 5 minutes spared to empty and reload the dishwasher.
- As with anything else during this process... be thoughtful about what you bring in to your kitchen. Don't bring in food you don't love and feel bad about eating. Don't bring in cooking tools you already have or don't need. This is much easier when you set rules for yourself. As an example: I don't like using plastic in my cooking. There are too many questions about leeching and hormone disruptors for my peace of mind. That made cleaning out our plastic storage, bowls, plates, cups, and cookware much easier and having that rule ensures that I won't bring those things back in to the house.

Another fun tip that I have learned via personal experience is something I recommend through this whole process. If you don't love it and you don't need it, let it go.
It's easy to think that minimizing means you have to only focus on function. I submit to you that form is almost as important as function and should be considered heavily throughout the whole process. Minimizing isn't just about getting down to the things you "need", to me, it's also about surrounding yourself with the things you LOVE. I have been going through this process with that very thing in mind and have found that when I have one item I love, I am happy to let go of 5 other things just like it that I am indifferent about.
For example... I have a soft spot for Pyrex Cinderella Bowls...
Through thrifting, tag sales, and antique shops I have built up a fun little collection for myself. And what surprised me is that I really enjoy cooking with these bowls. It actually perks up my mood when I mix up something in these bowls and it's not something I could have imagined happening unless I had found something I truly loved. Once I owned these, I found it easy to pass on several other mixing bowls that I didn't really want to use any more and had no need for.

Okay. Your turn!
Throw open those cabinet doors, get on your hands and knees, and get serious about organizing your kitchen!
You will be SO glad you did!


  Did you miss something in this series? Check HERE for more

07 August 2013

Becoming a Minimalist: Day 2

Today I figured I'd recommend something simple and fairly quick since the weather is gorgeous and I'm struggling for motivation to clean today.So here it is...


Establish a Morning Routine
I can only speak for myself but it takes a while for me to shake the grog off first thing in the morning but when I'm up, I am ready to take on the world!
... until about 2pm...
then it's back to grog. 
If I want to get something done, it really HAS to be in the morning otherwise there's a good chance it will sit for another day.
For me... an ideal day is ... and it depends on the amount of sleep I get... 
do a quick cardio workout (and I mean QUICK! Like... 10 minutes of HIIT) and get to cleaning. 
Unless it's a particularly lazy day, which happens around here from time to time... I send the older two to get dressed and then I get Bean and Baby J dressed and ready for the day. That means clean diapers, PJs are back in the drawers or in the dirty clothes basket, clothes for the day are on, and hair is done. 
When they're ready I send them all off to the living room to play or read while I spend a few minutes (again, 10-15 minutes tops) making beds, opening curtains and blinds, opening windows (if the weather permits), folding extra blankets, putting stuffed animals away, picking up any clutter in the bedrooms, getting dirty laundry that may have ended up on the floor the night before into the basket, getting the basket into the laundry room, and getting a load started in the washing machine. 
Oh! And I also empty the dishwasher and reload if necessary (which it almost always is in this house). 
Then I make breakfast and we are ready to take on the day. 
All told, this routine, up until I'm ready to make breakfast, takes anywhere from 20-45 minutes depending on whether I need a shower, how cooperative the kids are feeing, and how tired I was the night before (a.k.a. how messy I left the house when I went to bed the night before).
which...
leads me to a second recommendation of 
Establishing an Evening Routine
For our family, the nighttime routine typically involves having the kids pick up their toys in the living room and put their games away before bed. (Whether or not they actually help with this depends on the type of night it has been. Sometimes on crazy days it's best to just send them to bed and do it myself.) 
Before I head to bed I make sure the dining room is cleaned up from dinner (table washed, floor vacuumed) and run the dishwasher (if it's ready).  

I think establishing some sort of routine is paramount to starting and ending my day well. 
Waking up to the  mess puts me off on a bad foot.  
Going to bed leaves something hanging over my head. 

*A little note about bed making. My eighth grade teacher (Miss Brown) told us a trick I haven't forgotten yet. When our class complained about our parents making us pick up our rooms she suggested doing one thing, if nothing else. "Make the bed." Her logic? The bed is the largest thing in the room and if it's messy, it makes everything else look messy. On the other hand, if it's made, it makes the whole room look much better. And she was right! If nothing else, I try to make the bed in the morning just to bring some instant peace into the room and my day. Also, who doesn't love folding back crisp sheets when it's time to curl up and, in my case, pass out?

 If you don't have a regular routine, I highly recommend at least giving it a try. The total time commitment is, on average, 35 minutes of my day and that's well worth the rest I get knowing at least a little something has been accomplished. 

Did you miss something in this series? Check HERE for more
pix found here

02 August 2013

Becoming a Minimalist : Day 1

I'm  not gonna lie... I have no idea where this series is going to lead. 
I don't think, for me, it is only a matter of material things.
We moved almost two years ago and, let me tell you, moving is an excellent way to come face-to-face with all your material "stuff". I was shocked that we needed an entire tractor trailer in order to move our things to the new house. Even with that we have extra to take in the car with us. Hubs and I agreed to never do that again. Instead, we will have a moving sale, open the front door, sell/give it all away, and start fresh somewhere else with the money we make.

Beyond the tangible stuff, though, I think this process will involve getting rid of excess in other areas too. Maybe relationally. Emotionally. Mentally. I don't know specifics yet but I'm gonna find out.
So what do you think? 
    if you need a boost and feel a constant undercurrent of stress
    if you're a mom and feel guilty for not doing more with your kids
    if you struggle with contentment
    if you find yourself often saying "I might need it someday"
    if you sometimes dream about having more time and money to do things you enjoy
    if you forgot what it's like to do things just for fun
    if you've ever purchased something only to realize later you already had it
would you think about joining me as I seek out practical ways to get rid of the excess in my life?


For a practical start I highly recommend two things.
1. Pray over the entire process. This all began with a prayer that I could efficiently simplify. I know that I have NEVER known the meaning of the word "need" in my life and I haven't lived that way for some time. For me, it's a heart change that needs to take place and so I pray because without Him I can do nothing. (John 15:5)
2. Get your hands on the book or ebook Simple Living by Loriless Lippincott. She a Christian who offers some really practical ways to get started. Some of the things she mentioned I had already done and heard suggested by others so I will share a few of these as I go along...

Starting today!

Day 1: Cleaning Out My Closet
Fling open the doors of your closet, open all the drawers of your dresser, and tell yourself...
If I haven't worn it in the past six months. 
If it doesn't fit me...
If I don't like it...
If it's uncomfortable...
It it's too revealing or immodest...
If my husband/wife doesn't like it...
If I've tried it on several times only to be unhappy with how it looks and put it back... 
If it's stained/ripped/damaged beyond repair...
If I'm hanging on to it only because I know a simple fix will give it new life (and I have been telling myself that for longer than a month and am not motivated to fix it RIGHT NOW)...
IT'S OUTTA HERE!!!

Set aside items for your own tag sale (you're probably gonna have loads of stuff to sell when this is all over). Donate them. Give the rags to a local animal shelter for bedding, cut them up for reusable baby wipes, or pitch them. Either way, get them out of your house.

The Rationale...
I have found myself folding 7-8 loads of laundry too many times. I kept asking myself why this was happening and I realized it was because it took me that many loads to realize that I was low on clothes which seemed so excessive to me. Yes, we have 6 people under our roof and four of them are ever-so-messy-but-beautiful munchkins, but I know in my heart that we have more than we need in this department and I also realize that if I we all have less clothes to wear, I won't have to wash as many (think of all the unmatched socks!). So keep that in mind... the more you get rid of now, the less you have to launder later! 

A Note...
In this entire process I find that I am my own worst enemy. I can rationalize/convince/excuse my way out of just about anything and up until now I have but I want a different life. I want that extra weight on my shoulders gone. I want to be consumed with my husband, my kids, and doing the things we love to do together. I no longer want to be caught up with the "have tos" of my life which, at this time, most often is "Of course we can go play at the park but you have to clean up the entire basement first" (which often means a trip to the park doesn't happen)  or "I would love to play a game with you but I have to fold these 7 loads of laundry first" or "I would love to go to bed at 9:30 but I need to get the house picked up before I can rest".

So what are you waiting for?!
Go get 'em!

Did you miss something in this series? Check HERE for more

01 August 2013

Becoming a Minimalist

I'm just gonna throw this out there because I'm certain I am not alone...
Every so often I find myself overwhelmed with life but I am unable to explain why. Sometimes it happens on a good day when the kids are listening well. There is often and under current of discomfort that leaves me unable to relax and often feeling like I'm drowning in "stuff".
The kids will take out a particular game and my skin will crawl because I know the mess that would soon come out of that box. I will look for something to wear for the day and would try the same shirt on again expecting it would fit me brilliantly THIS time and be disappointed when it didn't fit just right again. I will walk past the same unfinished project and grumble about Hubs not making the time to finish it when I was just as capable of doing it myself and I just can't find the motivation. I sometimes find the motivation to deep clean the house only to get bogged down midway through or distracted by little projects in the way. I know that "things" don't bring me peace or joy and only fleeting happiness but yet I still want more.

Are you there with me?
I don't know, maybe I am alone in this but, not long ago, something in me told me I needed a change. The problem was that I couldn't seem to put my finger on what it was.

So fast forward to now...
We are hosting a big ol' tag sale (garage sale, yard sale...)  in a couple of weeks. I have been pouring over all of our earthly goods for months, touching just about everything we own and making the decision to either keep, sell, donate, or trash.
Round one of my tour around the house left me feeling as though I could do better and so I began round two determined to pull out more "stuff". I held things in my hands that I had struggled over whether or not to keep in the past, I asked myself tougher questions like
"Yes, it's cute, but why has it been in the storage closet since we moved in?"
"Yes, CJ looked adorable in this but seriously, will you remember this twenty years from now?"
"Your taste has changed since the old house, why are you still hanging on to this?"
or how about this one...
"Yes, I hate it, but they gave it to us and wouldn't that just be terrible of us to get rid of it?"
and then I would find myself just placing the same items back on the same shelves or hanging them back in the same closet because I couldn't convince myself that it was time to let go.
It's the stuff I wore before kids that I'm working on getting myself back into.
It's the first toys that we bought for the kids that they never played with but I remember giving to them.
It's the vase that has a beautiful form but is completely lacking function.
It's the shirt I always loved on Hubs even though he never wears it because he hates it.
It's this kind of "stuff" I have been struggling to let go of because I seem to be able to conjure up a reasonable excuse that letting it go just seems to be a waste.

So I went on Pinterest, as I usually do, in the hopes of picking other people's brains about proper motivation  for getting rid of "stuff" and I found Simple Living - 30 Days to Less Stuff and More Life. 

I found it ironic that as I was looking to get rid of things in order to have less I ended up buying another book to get me there.
(It was the Kindle version. Does that count?)
It doesn't really matter to me now because I ate this book up!I stayed up late reading it from "cover - to -cover" because it was so practical. It broke down the projects into simple steps, one day at a time and my favorite part was "Day 1" where you're asked to conjure up your dream house and dream life. What it would look like? What would your schedule look like? What activities would it include? What activities would you be certain not to?
I nearly kicked myself because that is the same principle that Gary Ezzo uses in BabyWise and the one that I have hung on to since first reading his thoughts on parenting.... "Start as you mean to go on". Basically, have a goal, work towards it, and get rid of anything that doesn't work to get you to it. It's such a simple principle and yet I forget it so quickly.

Set. A. Goal!

So I did. I even asked Hubs what his thoughts were on the matter. What did he want our house to feel like? What were places he loved to be and why? What did he want HIS schedule to look like? What did he want for the kids? etc. Honestly, after that part I hit the ground running and didn't want to look back.

So who's with me?
Who is not living the life they wish they were?
Who is feeling like they're treading water and can't seem to get where they wanna go?
 I'm not suggesting that I am a life coach and have all the answers, I'm simply saying that I have a problem and after making a few changes I have begun to see a little light breaking through...
And I've decided to take you along for the ride.

Want to read more in this series? Check HERE

Becoming A Minimalist: Index Page


Introduction: What Got Me Started It's all about the heart for me. I found myself frustrated with my surroundings and with my kids for no good reason. Even our good days were overwhelming but I couldn't put my finger on what it was. Was I depressed? Was I anxious about something? Was I pregnant...again?! It wasn't until I started my own "journey" of decluttering that I realized my anxiety and stress went out the door with the "stuff" I was clearing out...

Day 1: Cleaning Out My Closets You've gotta start somewhere, right? I've listed some criteria for how to decide what to keep and watch to pass along. Bite the bullet and get started with me!

Day 2: Establishing Routine Going to bed and waking up to a clean home brings instant peace. Here are some of my tips on how to organize your time at the beginning and end of each day.

Day 3: Tackling the Kitchen This is an overwhelming room all by itself! If you're like me and the kitchen is the hub of your home, it's very easy to get lost in the millions of pieces of cookware, bakeware, and gadgets that seem to gather here. I've listed some practical suggestions to get you through a round of cluttering right now.

Day 4: Clear All Horizontal Surfaces Visual clutter makes all the difference and in under five minutes you can improve a room and breathe a little easier.

Day 5: Going Through the Kids' Toys This may seem like an overwhelming challenge but I've given you several tips and steps to get it done and keep it controlled from here on out. Don't be scared!

Day 6: Just Say "No" to Storage I know, I know... this probably seems to make no sense...


quote

09 May 2013

Kale Chips

I've seen these before.
You probably have too.
They look super healthy and therefor a bit... well..."ehh".
But I was curious.
So we tried them.
They're oddly yummy!
Like... crunchy air.
The kids loved them.
A little too much.
I've made two batches in the past two days and Hubs hasn't had any because they're gone before he gets home.
CJ, Bean, and I are veggie lovers anyway so that may be part of it.
Yeah... I recommend trying them at least.
You just might like them too.


12 April 2013

Prop 37 Supporters/Opponants

During the last election there was a BIG movement nationwide (well, specifically in California but it would have affected the entire country) to require companies to label food with GMO ingredients. At this point in time we can safely say the vote did not pass but there are many out there who are claiming voter fraud so maybe it's not all over yet. Either way, just because food packages won't be labeled doesn't mean you don't get to know the nitty-gritty. So here's what I've found so far...

There are those that don't use them and supported labeling... 


and those those who do.

(top left)(top right)(bottom left)(bottom right)
Ugh.

I'm just beginning to scratch the surface so these lists may change but for now... that's the story.
Blah!

04 April 2013

Ghee

Every heard of ghee (pronounced gee)? How 'bout butter oil? Clarified butter?
I hadn't until about six months ago when I was looking for healthy cooking oils as alternatives to the old standbys that, I'm discovering, aren't as fantastic as we're told they are. (More about that at the bottom of the post if you're interested.)
I like coconut oil for baking, granola, curry, and other sweeter cooking but the coconut flavor can come through so if it's a savory dish I like more of a butter taste.


Anyway, ghee is original to South Asia and is used for rices and lentils mostly but it is delicious on steamed vegetables. From what I've read when you heat the butter the milk solids are removed so it has been known to be a good option for people with a low dairy tolerance. It's great for frying and sauteing with a high smoke point of 482 F and has been shown to lower bad cholesterol as naturally saturated fat foods will do. (Yes, saturated fat may actually be GOOD for you and low fat just might be bad but that's another discussion for another day).

So... where can you get ghee?
I have seen it in stores sold in jars but it's so simple to make and I know exactly what the butter source is so I quickly and easily make my own.
Here's how...
Place one cup of the butter (salted or unsalted, I've done both and they're both fine) in a saucepan.
No, not all butter is created equal. Grassfed and the darkest yellow you can find are best.
I personally prefer Kerrygold blocks wrapped in foil, not the spreadable tubs and have found that the best price around is at Trader Joes.
Heat the butter on medium high heat until it begins to boil.
There will be two foaming stages. Some people skim the foam off the top but I have seen no need to do this plus I'm cheap and hate to see any butter wasted to the skimming process.
The butter will foam once, as shown above , and then clear up...
until it foams the second time. According to Alton Brown the second foam indicates that the ghee is done. It will be a deep golden yellow and the milk solids will fall to the bottom of the pan..
or, as in my case, the boiling will cause some of the milk solids to rise to the top.
Strain how ghee into a heatproof jar and let cool.
(milk solids left in the pan)

The first time I did this I was shocked that the ghee was no longer liquid after it cooled. Instead it was somewhat of a gritty, grainy texture but it melts right back to liquid once heated.

So why not olive oil or canola?
First, I am not a nutritionist and have conducted no personal studies but our families eating mantra is "as God intended it" which basically just means with as little processing, pesticides, and tampering with as possible. If it required intense processes and intimidating machines... we avoid it. That's about as simple as I can get.

Olive oil is great IF you don't overheat it. Research has shown that olive oil can be damaged at temperatures as low as 320 F. Some go as far as to describe its post heated makeup as "toxic".  We use it on salads and just about anything else we don't heat.

Canola Oil  is a product that all together gives me the willies. It's sold as a health product but nothing about it makes me feel good. According to Sally Fallon, co-founder of the Weston A. Price Foundation writes in her cookbook Nourishing Traditions... 
"the newest oil on the market, canola oil was developed from rape seed ... which is considered unsuited to human consumption because it contains a long-chain fatty acid called erucic acid, which under some circumstances is associated with fibrotic heart lesions. Canola oil was bred to contain little if any erucic acid and has drawn the attention of nutritionists because of its high oleicacid content. but there are some indications that canola oil presents dangers of its own. it has a high sulphur content and goes rancid easily ... during the deodorizing process, the omega 3 fatty acids of processed canola oil are transformed into trans fatty acids..."

Vegetable Oil is almost always corn oil or soy oil and both of those ingredients are high on the GMO list. For that reason, alone, I avoid it. 

The reality is that you can find research to support just about any theory you have but these are two instances that I haven't been able to refute to my satisfaction and for our family it's "better safe than sorry".


03 January 2013

Clearning Nasal Congestion

First off... I don't know how the past week whizzed by!
I cannot believe how much more quickly time seems to pass with each kid we add to this family.
It's IN.SANE!
So anyway... after all this time I have so much set aside to share and yet I have found something to trump it all.
Something I think every parent of little ones, from newborns to toddlers and maybe older, should go purchase.
I mean NOW!
I mean, after I tell you what it is...

My sister gave it to me for Nugget this Christmas.
Thankfully, he has had some minor congestion at night due to our dry house (I get it too) and so I put it to use as soon as I got it home.
This baby works!
It's called NoseFrida the Snotsucker and yes, the picture is correct, you literally suck the boogers out of your kids' nose with this little baby. (Don't worry, there's a healthy sized filter between you and said boogers!)
It cleans way better than a the good ol' nasal aspirator and though the suction is stronger I feel as though the process is much gentler. I've used it every night since I got it. After dropping a couple of drop of saline water into Nugget's nose and massaging each side, I place the mouthpiece into my mouth, the other end at little guy's nose and begin to suck away.
So strange.
So gross (I couldn't do it with Hubs in the room, I was afraid to laugh and blow air in instead of out).
But so good. 

12 November 2012

Homemade Vapo Rub

I'd been looking for an alternative to store bought vapo rub which all seem to be petroleum (or mineral oil) based.
Why do I skip the petroleum based products? Do a Google search and you'll find plenty of reasons. If nothing else, I figure that when something is strong enough to run my car, it has no business being ingested via lip balm on my lips or sucked in through my biggest organ, my skin. I'm not here to convince anyone of anything. Skipping petroleum is just what we do in our home.
Anyway...

I found this little nugget over at Crunchy Betty and have made it three times already. I love this stuff. It was a big help during the nearly month long virus that overtook the whole family. It tamed the cough, allowed the kids to sleep, and, if nothing else, gave me a peace of mind knowing that there was at least a little something I could do to relieve their discomfort naturally.

The recipe is exactly as Crunchy Betty shares it but to save the trip I'll share it here... 

2 tsp beeswax
1/4 c olive oil (I've made it with grapeseed oil too)
25-35 drops of peppermint essential oil
15 drops of eucalptus oil
10-15 drops rosemary essential oil
{beeswax pellets can be found at most health stores as can the essential oils shown below}
Melt the beeswax and olive oil together in a double boiler.
Stir well with a whisk.

Continue whisking while adding essential oils.
*You may notice that the peppermint smells really strong while adding. Don't be tempted to skimp because of this. The strength of the smell fades as the mixture cools. 
Transfer to small lidded container (in this case a baby food jar)
Store in dry cool place for a year or more (It hasn't lasted that long in our house.)

I HIGHLY recommend giving this a shot in your home because of the number of times it's generally applied when we and our little ones are sick. 
Happy Monday!

05 November 2012

Another Reason to Love Coconut Oil


As if I really needed another reason to love coconut oil.
Seriously.
I have been using it for a few years now.
As a matter of fact I have confused many a newbie with all the ways that I use it.
Off the top of my head...
body and facial moisturizer - makeup remover - diaper rash cream - taken with vitamins to enhance absorption - cooking oil for baking - oil for granola - massage oil- deodorant ingredient - frizz tamer
I promise, I could go on for a while.
Anyway... there are two downsides to coconut oil (hey, nobody's perfect!) BUT WAIT! It's okay... I found one solution...

The first problem is that for as moisturizing as coconut oil is, it doesn't do the trick in the cold winters the way I need. Living in New England means temperatures flux and my skin requires a little more hutzpa than coconut oil can offer. For the winters I often use something like Aveeno or homemade lotion bars a friend gave me which both work great!

The second problem (and the reason we are all gathered here today) is that coconut oil solidifies around 76 degrees F so anything cooler than that and I have to literally scrape it out of the jar or melt it on the stove to use. Not impossible, just annoying.
The solution...
You must whip it!
No additional ingredients are required, it's just like scrambled eggs, to get a great texture you need to add air. And the best part is, we keep our house between 63 and 66 in the winter and so far it's stayed soft and easy to use.
I found the original recipe at The Nourished Life and, as usual, tweaked it a little myself which basically just means that you can tweak it to work for you based on what you have handy. The original recipe can be found here (where the above picture is from) or you can take my word for it that this recipe isn't a science and wing it on your own kind of like I did.

What You'll Need:
coconut oil, no specific amount but I did a little over three cups
shea butter (optional), no specific amount but I probably used 2 tbsp
essential oil (optional), I used 20 drops

What To Do:
Place all ingredients into a large bowl. 
Using a stand or hand mixer, whip the oil for 7-8 minutes until light and fluffy. 
Put into container with lid (we buy shallow plastic dollar store lotions with screw on lids, dump the lotion, clean the containers, remove the labels) and use as needed. 

*the coconut oil does not need to be melted. I used it as a room temperature solid mass however if it's too hard it may do a number on your mixer whisk.

*I used 20 drops of lavendar essential oil because we usually use our coconut as moisturizer right before bed and it is usually calming. if you use yours in the morning then grapefruit would be nice pick-me-up or if you use it as a facial toner then tea tree oil could be good as it is antiseptic. It's really up to you. 


11 October 2012

Fall... and What I DON'T Love About It

As a lifelong New Englander, Autumn is, by far, my favorite season.
<cough>

The fall that I love features opening the door and breathing in the crisp cool morning air, knit sweaters, wool socks, steaming mugs of apple cider and cider donuts, rich vibrant colors of maple leaves and asters, footballs watched with hot stew in hand, and the early sunsets that invite our family inside and under blankets together...
<cough>
oh yeah...
<cough>
and for the fall I'm actually living with right now...
It involves things like runny noses, nagging coughs, and an mountain of tissues stacked knee high in the trash....
Yeah... that's where we find ourselves these days.

Miss Mak and Bean have been dealing with coughs that snuck in very quietly on Sunday morning, dropped like bombs on Monday, and haven't let up yet.
Last night was possibly our worst night in the history of "us"...
16 month old Bean began coughing at 12:57 and it didn't relent until well after 2.
Of course, as soon as Bean's cough gave up, Miss Mak woke on the hour every hour wanting me to get her water for her and various other things that are kept WITHIN INCHES OF HER FACE EVERY NIGHT!!
<cough>

Basically, what these little ladies have is a bad case of post nasal drip which means that there isn't a whole heck of a lot we can do for them. Suppressing the cough may be counter productive since it's working everything out and keeping it loose. Drugs aren't an option because 1. there two small for anything strong and 2. the boogies are clear as can be so there's no infections.
<double cough!>
We have done everything we can think of to do... and that was the point of this whole explanation to begin with...
I wanted to share with you some of the smart, interesting, and downright silly things that I have heard of and some things I've actually been trying just to get these girls the rest their little bodies need.

1. Homemade vaporub under their noses, on their chests, and slathered on their feet.
2. Humidifier running constantly with hydrogen peroxide in the water and eucalyptus oil in the tray.
3. Sitting in the bathroom with the hot water running until the steam clears our their noses.
4. Spoonfuls of honey and grated fresh ginger.
5. Using a aspirator to suck the loose stuff out after number 3.
6. Saline squirts in the nose to dry out the passages a little.
7. Rocking in the rocking chair upright for a period to get everything draining.
8. Trying to get to sleep while propped up with copious amounts of pillows and holding a child over my 34 week preggo belly. {Won't be doing this one again.}
9. Here's where it gets a big weird... placing a bowl of freshly diced onion on the side table. {I heard it works and after days of nasty coughs I've decided to try just about anything.}
10. Placing some of that diced onion between the two layers of socks on their feet.
11. Praying a lot... which I want to add a side note to this one... I am in constant prayer when our babies are sick. CONSTANT. In the past my usual prayer goes something like this...

"Dear Heavenly Father, please stop these coughs so [insert child's name here] can get the rest that they need. Please allow their bodies to do exactly what you've created them to do and if keeping them under the weather is your plan, please, please, PLEASE change the plan! Sincerely yours..." 

Last night, for the first time that I am aware, I opted to go an unusual route which didn't involved asking for healing at all. Instead it was something more like... 

"Dear Father, Thank you for the beautiful babes you have put into our care. Thank you for the many uncounted days that they are normally healthy. Thank you for being sovereign and having a plan for this very day before there was even time. Your mercies are new every morning and your goodness continues through all generations. Amen." 

I say all of that to tell you that not only did I finally fall asleep shortly after {or was it during} this prayer, but I also felt a sincere peace about what was going on by focusing on the big picture of God's goodness to our family rather than the finite moment of this frustration and worry. 

All this is said whilst our sweet girls continue to cough, gag, and hack as they try to nap.
Ugh...
Praying you dodge this in your home! 
Happy Thursday!


01 August 2012

Sun Tea

Posting about drying clothes outside got me thinking about my Gram's house where I always saw towels and sheets slowly rippling in the gentle breeze of summer. In that very same picture I recall a big jug of sun tea brewing on a bench.
What a beautiful memory!
So I decided to relive it and make my own.
My mother in law still makes it each summer in a gallon sized pickle jar (well washed, no worries) and she adds mint in for added flavor. It's delicious and I often selfishly drink most of the gallon all by myself.
Either way, if you've not tried it yet well then... quite simply... you should. 

What You'll Need:
a glass pitcher, jug, or jar (I don't recommend heating plastic so I always use glass)
a cover of some sort to keep the bees out
sugar (added in 1/4 c increments)
10 tea bags
a bunch of fresh mint leaves

What To Do:
Fill your pitcher 90% of the way with water.
Add the tea bags (to keep from having to collect stray bags, tie the strings of all the bags together so you can pull them out at once).
Cover with lid.
Place in direct sunlight.
The timing will vary based on how strong you like your tea and how hot the sun is that day.
I place ours on our grill which has a black cover so the sun was drawn in and it only took about an hour to steep the way I wanted it.
While tea is still warm, add sugar in 1/4 c increments and stir, keep doing this until you get your desired sweetness. (Mine took only 1/2 a cup).
If adding mint leaves... tear leaves off stem, add about a handful to the tea and stir. Recover= and place back in the sun until the flavors have melded the way you like them. This was only another 30 minutes for me on a very sunny day.
Refrigerate to cool and serve.

30 July 2012

Two Summer Money Saving Tips

These two tips may be considered old news but just because they're old doesn't mean they aren't good. 

1. Sun drying your clothes. 
Our grandmothers did it, our mothers may or may not have done it, and by golly, we should too!
Why? It's FREE! Who doesn't love that?!
{Well, for the sake of full disclosure, if you don't have a clothes line, a drying rack, or a sunny spot of deck railing, it may cost a little but it's a one time cost which is good too!}

Currently, as I wait for the posts sitting in our garage to be transformed into a clothesline in the hands of master carpenter Hubs, I have resorted to the deck and a stand alone drying rack I got from Target.
The upsides: Low/No cost. Clothes smell wonderful! Saving electricity therefore saving money. Get in touch with your ancestors. The sun has natural bleaching and germ killing abilities. Drying has been just about as quick as the conventional dryer for me so far, that includes towels **.
The downsides: Rainy days happen. There isn't always enough room for all the loads. Risk of bird droppings which I have avoided thus far. 
**Many people consider crunchy towels and stiff jeans as a downside but that can be easily avoided by tossing the them all in the dryer for a few minutes once the sun has gotten them about 80% dry.

2. Save money while using your central air. 
If you're like me and love fresh air stirring around the house every once in a while, this tip is a big help. Let's say you keep your house around 73 for the daytime, go ahead and set it for that in the morning and then, if it's not super hot out in the morning go ahead and open all your windows and let the breezes flow. Yes... keep your A/C on with the windows open! Once the air begins to warm up, usually around 11 for us here in New England, the A/C will kick on and that's when you go ahead and shut all the windows and curtains up. This way everybody wins! You get your fresh air while your A/C unit gets a break and doesn't have to work so hard to get the house cool again.

That's all for today.
Happy Monday!

05 July 2012

"The Only Spot Remover You'll Ever Need"

Originally from glamour.com, I found this recipe on One Good Thing by Jillee and it has turned me, an I'm-too-lazy-to-try-so--I'll-just-make-the-ruined-shirt-into-pajamas girl into a why-not-remove-the-stain-since-it's-so-easy girl instead.
 I'll get right to the goods...
1 part Dawn (the original blue kind)
2 parts regular ol' hydrogen peroxide
1 spray bottle
I tried making this by first putting the ingredients into my spray bottle and shaking. Not my smartest move.
The best way, I've found, is to use a liquid measuring cup with a spout, measure out the ingredients (for my bottle size that means 1 c peroxide, 1/2 c Dawn), stir with a fork, pour into container. Fini!
When it's time to apply, I recommend using a scrub brush to work it in... 

This was way too easy for me not to try and so far I've removed axle grease from Hub's dress shirt, oil stains from Miss Mak's pants, drool stains from Bean's collar, who-knows-what-he's-been-into stains from CJ's play clothes, and I even used it as the spray solution on my carpet when my brother walked through my house with grease laden boots.
I did try it out on a cloth napkin I have used for 6 years for my bread basket which has been drenched in butter and oil. After several washes the oil stains were definitely gone but the yellow coloring was still visible which makes me wonder more about what was in the butter I used to use than the cleaner's power.

Needless to say, I'm a believer!

**** UPDATE ****
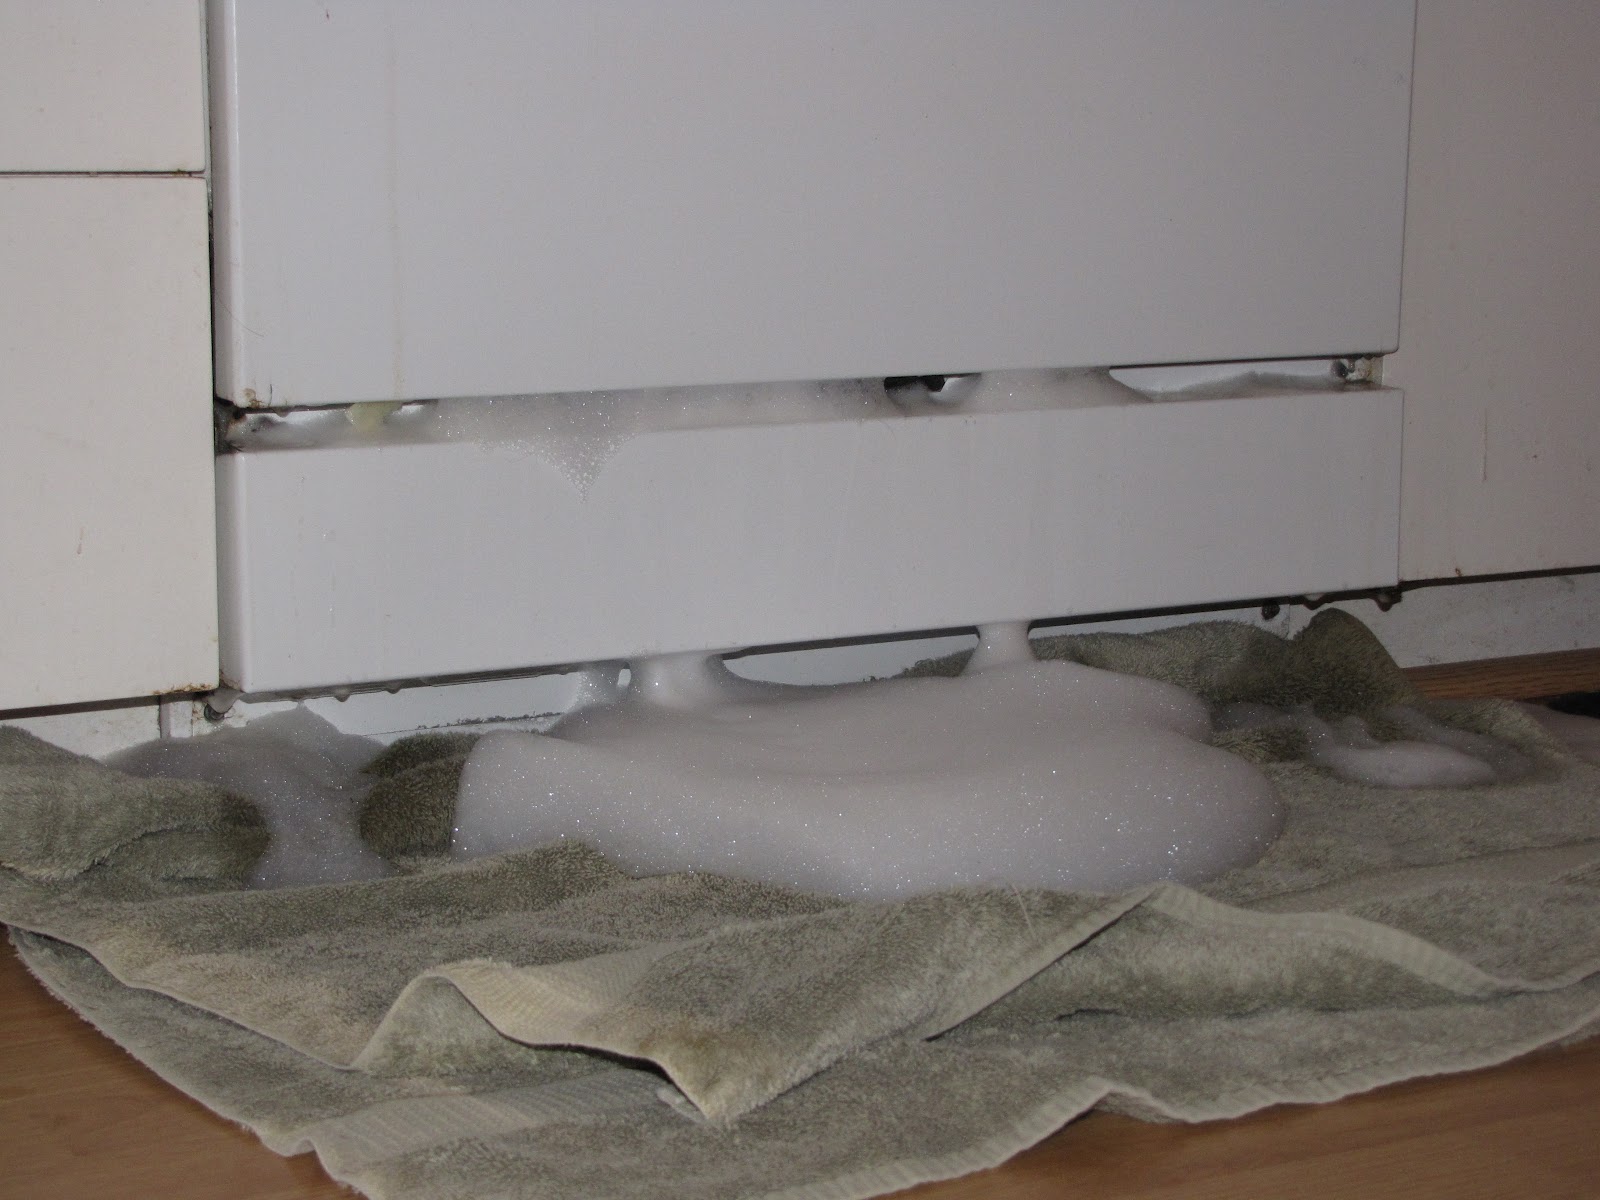
Be sure to rinse out the measuring cup you use before putting it into the dishwasher otherwise you may be in for a little of this... 
Whoops!

25 April 2012

Scrubbing Hard to Reach Places

I can only assume that at one point in time or another you have been faced with an oddly shaped bottle as I often am. Homemade yogurt and kefir have fat/cream in them and that means that lots of goodies stick to the sides of my jars.
Until now I have been shoving steel wool down into the jars and with the very tips of my fingers done the best that I could. I often pulled the not so perfectly clean jars out of the dishwasher, looked over the film left inside, shrugged, and put it away in the cabinet figuring there wasn't much I can do.
BUT NOW...
thanks to a handful of rice, some water, and some amazing biceps...
 
 
 Problem solved!

LinkWithin

Related Posts with Thumbnails