

Finally, a couple of months ago my sister-in-law, Gigi, and I took an afternoon and started at the edge of town and went down Main St. stopping at every small shop that caught our eye.
I came home with a couple of prizes {ex: large, teal pyrex in mint condition}...

"ain't she pretty?!"
and new found appreciation for small shops.
By the way, I visited a yarn shop not two minutes from my house and though the prices are higher, the selection is amazing, boasting yarn made here in town all the way to yarn from Italy}, and the quality is way beyond what I can find at the big box craft stores around here. Yay for local!
{But that's another story all together!}
BACK TO THE POINT...
I also found a lovely shop that sells unique frames!I have loved interesting picture frames since as far back as I can remember but I've discovered that 1. they are nearly impossible to find and 2. once you find them, they're often pricey.
Boo.
This shop had them on sale for 50% at prices I considered buy-worthy so I snagged these two


Step 2. prime and paint. I used a white spray paint to start.
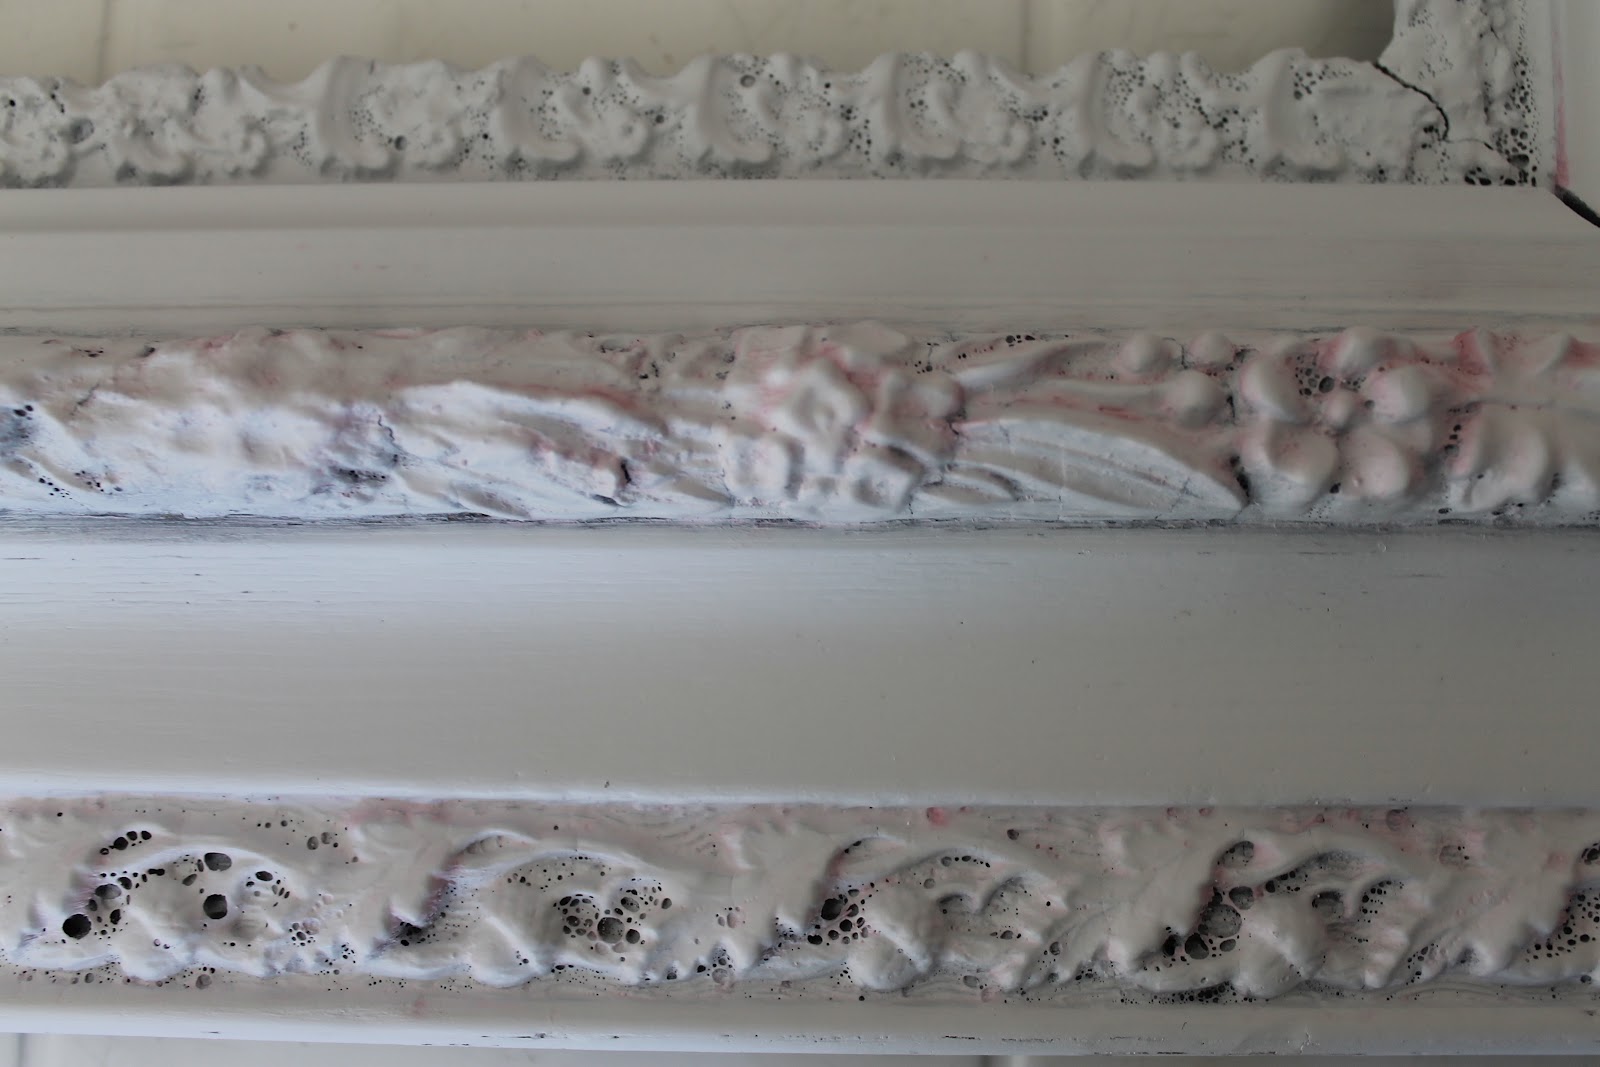
Step 4. Once it has completely dried, rally your paints and a medium bristled paint brush for some easy aging...

I found that using just one color gave the finish a "chunky", stark look so I gently mixed these two to get a more random finish. I added a little water in some spots as I brushed it on to keep the effect patchy and let the paint sit for just a minute or two.

Step 5. Using a wet microfiber cloth, I wipes off the excess paint. In some spots the paint stuck nicely into the grooves, in others it just wiped away so I used the cloth to wipe more or less of as I liked. I also over-cleaned in some places and went back with another round of paint and let it sit longer. This step is is very versatile and open to creativity. Since you're washing it off, it's difficult to mess this up.
Step 6. Let dry and hang.

This is a temporary hanging for me because I'm going to make this a cork board soon to pin the pictures up. For now, this is what I've got and even with the pink, I lurv it!
No comments:
Post a Comment
I always love a good comment.