He tends his flock like a shepherd: He gathers the lambs in his arms and carries them close to his heart;
he gently leads those that have young
. {Isaiah 40:11}

Showing posts with label Dessert. Show all posts

07 January 2013

Best White Cake & Buttercream Recipes


Tomorrow is Miss Mak's third birthday and we had my side of the family over last night to celebrate with the usual cake and coffee.
I made a similar cake to the one I made for her last year but this time with a different recipe. 

Pinterest, or course, claims this is "the best" so I wanted to give it a shot for myself. It is truly delicious. 
To be honest, I figured one cake is just as good as another as long as the flavor was good but this one was noticeably good in texture and flavor. The recipe is found at Recipe Girl and since I am not exactly the best baker I followed her instructions to the T. It starts with a boxed white cake mix and adds a few things along with a cup of sour cream. It's quick to put together too. I kinda love everything about it.

As for the buttercream recipe, I also found it on Pinterest (originally from Savory Sweet Life) and I picked this one because it was one of the only buttercream recipes I could find that actually used butter and not shortening. You can tweak the measurements just a pinch to get them how you'd like. I stuck with two tablespoons of milk and added the fourth cup of confectioners sugar, in case you were wondering.

I opted for a pink "hombre" cake where each layer became a darker shade of pink. Since Mak's birthday is in January the lighting isn't that grea tbut I did what I could to show you what we had. 
With a quickly growing family, the 21 of us quickly polished off the cake and left not even a crumb for a good pictures in the morning. 
Yes. It was that good.

18 September 2012

Golden Graham S'mores Squares

I may or may not have made the mistake of going grocery shopping right before lunch the other day.
Keep in mind that I'm in my third trimester and always hungry so this was just a B.A.D. idea.
I bought things that I don't normally buy...
like Golden Grahams, Cinnamon Toast Crunch, and mini donuts.
In the interest of full disclosure I bought 4 boxes of Golden Grahams.
THEY WERE ON SALE, I SWEAR!
So yeah... needless to say that after I ate lunch and my hormone levels began to return to normal I smacked my forehead wondering what I had just done and immediately went to the net to find a way to get rid of these things before Hubs and I ate them all.
Trust me. It would happen. And quickly.

Anyway, here's the goodness that I found and the only thing I wanted to say (other than they're crazy tempting) is that, as a known choco-holic, I'd cut back the chocolate chips to just 1 to 1 1/2 cups.
 Golden Graham S’mores Squares
What You'll Need
1/4 c butter
1 (10.5) oz bag mini marshmallows, plus 2 cups
7 cups Golden Graham cereal
2 milk chocolate chips

What To Do:
Grease 9x9 pan (I used 9x13)
Over low heat, melt butter. Add 10.5 bag of marshmallows (leave the 2 extra cups for later). Stir until melted. Remove from heat and add cereal. Let sit for 2 minutes. Pour in extra 2 cups of marshmallows now and stir in chocolate chips. (They'll get a bit melty at this point so just stir until everything is evenly combined.) Pour into your prepared pan and let cool 15 minutes before cutting into squares.


By the way... this did not stop Hubs and I from eating them all. In fact, we ate more sugar in the end. But as far as snacks go, this was a tasty one and I'll keep it in my back pocket in case I have another weak moment.

10 September 2012

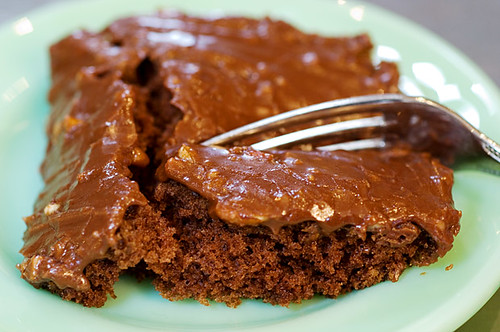
Chocolate Sheet Cake from The Pioneer Woman

Apparently pregnancy has gotten the best of me and the insane baking and sugar intake has kicked in.
This time around, it's Ree's "Best Chocolate Sheet Cake. Ever." that caught my attention.
It's pretty simple, doesn't take too long to make, and I had everything I needed already which is always a plus in my book.

No reinventing here. I'm just going to send you on over to Ree's page and encourage you to give it a shot.
This bad boy makes a lot and cuts up easily like brownies so it's actually ideal for big groups.
Hope you enjoy! 

06 August 2012

Oven Roasted Fruit

 
Oven Roasted Fruit
This recipe is heavily based on Ina Garten's recipe with just a couple minor changes. 

What You'll Need:
6 peaches, pitted and cut into quarters or eighths
6 plums or Italian prune plums, pitted and quartered or halved
2 cups fresh raspberries

What To Do:
Preheat oven to 450 degrees F. Place the peaches and plums snugly in a single layer, cut side up, in 2 glass or porcelain oven-proof baking dishes. Top with the raspberries. Bake for 20 to 25 minutes, until tender.
Heat the broiler and place the fruit about 5 inches below the heat and broil for 5 to 8 minutes, until the berries release some of their juices.
Remove from the broiler and serve warm, at room temperature, or chilled.
We put it over ice cream. Yumm-O!

**The only difference between this version and Ina's is that she adds 1/2 c sugar to the fruit before baking and when it's all over, she adds 2 T orange juice to the berries before serving. 


16 July 2012

Grilled Peaches and Berries


Here's What You'll Need:
3 peaches or nectarines   1 cup berries   2 T butter   1 T lemon juice   2 T brown sugar

Here's What To Do:
Set your grill to medium-low.
Lay your peach halves on a 12"x12" square of heavy duty or double up foil.
Pour berries over top.
Pour the remaining three ingredients over top and wrap the foil into a ball to seal the steam in.
Grill for about 18-20 minutes or until the peach is tender.
Carefully open and enjoy!
We served ours over vanilla ice cream. So good!
I found this recipes at Taste of Home

23 May 2012

Individual Fruit Pizza

We had a baby shower for a beautiful friend this weekend who may very well be the cutest pregnant woman I've ever seen!

I was asked to make something to eat at the shower and of course I jumped at the chance to try out some new recipes I've found on Pinterest!
There has been a really fun fruit salad idea going around from The Entertaining Elf that's perfect for baby showers but it's a bit popular and I like off-beat so I opted for the fruit pizza idea I found at Joy Is At Home which I spun off of and used the Amazing Fruit Salsa recipe I love so much. 

So here's how it goes... 
What You'll Need: 
sugar cookies {baked and cooled}
1 container cool whip
8 oz cream cheese
1 batch of fruit salsa 

What To Do:
Mix cool whip and cream cheese together with a fork or hand mixer. {If you taste this mixture you'll notice that it's light on flavor but I promise you, that's just how you want it.}

Get your cookies handy...{I opted to save my time and use the Pillsbury cut and bake.
 They hold up well if the salsa gets juicy. I don't recommend using a soft sugar cookie recipe with this.}
   and then...
 and...
Finally, you send me a "thank you" card for finding and sharing this yummy-ness! 
Happy Day To You!!

11 May 2012

Question...

Why are you and I not sitting together, right now, with a cup of coffee and a plateful of these?...
or these...
or these...
 Excellent question, is it not?!

Well...
even if we can't be together today, we can still bake, right!
Or maybe I'll just take a nap...
Either way... HAPPY WEEKEND, friend!

18 April 2012

Waffle Iron Cinnamon Rolls

I am in no uncertain terms claiming that these are healthy, just that they are quick and dee-licious!
{P.S. I've read that you can do this with cookie dough too! I'll keep you posted.}
What You'll Need:
refrigerated cinnamon roll dough
waffle iron
 
What To Do:
Plug in waffle iron. Once heated, place individual rolls around the iron. Close. Wait until light brown all around. Frost... or don't. Let cool... or don't. Enjoy! 

20 February 2012

King Cake

 
Remember when we had some visitors?
Well she just so happens to be a bonafide Louisiana girl!
...and while she was here, she taught me the beauty of the King Cake... which basically means she showed me the recipe she uses and we made one together.
If you're unfamiliar with a King cake you can find plenty of information online about it's long and rich history and how it relates to Mardi Gras {which is tomorrow}.

Flavor-wise it's a sweet yeast bread with a cinnamon and butter center and a sweet sugar topping. It's somewhat moist and reminds me of a cinnamon roll. In other words, it's yummy!
I'm planning to make one tonight for Hubs to try. He wasn't here when we made it and since he is a true northerner I'm not sure he even knows what a king cake is!
Wanna try?

This recipe makes two cakes and does require almost 3 hours of rising and 30 minutes of baking. 

What You'll Need: 
Pastry: 1 c milk, 1/4 c butter, 2 (.25 oz) package dry yeast {4 1/2 t}, 2/3 c warm water, 1/2 c white sugar {divided}, 2 eggs, 1 1/2 t salt, 1/2 t freshly grated nutmeg, 5 1/2 c all purpose flour

Filling: 1 c packed brown sugar, 1 T ground cinnamon, 2//3 c chopped pecans (optional), 1/2 c all purpose flour, 1/2 c raisins (optional), 1/2 c melted butter, 8 oz cream cheese (optional)

Frosting: 1 c confectioners sugar, 1 T water or milk

What To Do: 
Scald milk {heat to about 180, just below a boil}, remove from heat and stir in 1/4 cup of butter. Allow mixture to cool to room temperature. 
 In a large bowl, dissolve yeast in the warm water with 1 tablespoon of the white sugar. Let stand until creamy, about 10 minutes.
 
 When yeast mixture is bubbling, add the cooled milk mixture. Whisk in the eggs. Stir in the remaining white sugar, salt and nutmeg. Beat the flour into the milk/egg mixture 1 cup at a time. 
 
When the dough has pulled together, turn it out onto a lightly floured surface and knead until smooth and elastic, about 8 to 10 minutes. {I ended up adding over half a cup more to get the texture I needed.}Lightly oil a large bowl, place the dough in the bowl and turn to coat with oil. Cover with a damp cloth or plastic wrap and let rise in a warm place until doubled in volume, about 2 hours. When risen, punch down and divide dough in half. 
Sorry... no pictures...
Preheat oven to 375 degrees F (190 degrees C). Grease 2 cookie sheets or line with parchment paper.  

To Make Filling: Combine the brown sugar, ground cinnamon, chopped pecans, 1/2 cup flour and 1/2 cup raisins. Pour 1/2 cup melted butter over the cinnamon mixture and mix until crumbly.
OR
Mix brown sugar, cinnamon, flour, butter and cream cheese. {We tried both fillings and I preferred the one with cream cheese. It was moist and sweet!}

Roll dough halves out into large rectangles (approximately 10x16 inches or so). Sprinkle the filling evenly over the dough and roll up each half tightly like a jelly roll, beginning at the wide side. Bring the ends of each roll together to form 2 oval shaped rings. Place each ring on a prepared cookie sheet. With scissors make cuts 1/3 of the way through the rings at 1 inch intervals. Let rise in a warm spot until doubled in size, about 45 minutes.  
 
Bake in a preheated {375 degree}oven for 30 minutes. If you are familiar with putting a trinket in the cake {in Europe it's often a bean} now's the time to add it by pushing it into the bottom of the cake. Frost while warm with the confectioners' sugar blended with 1 to 2 tablespoons of water or milk. 
Top with yellow, green and purple sugar. 
 
Enjoy!  

09 February 2012

Valentine's Snack Idea

 
The kids and I did some light cooking and heavy snacking the other day and wanted to share our goodies with you!
 Melt 3 tablespoons of butter in a large pan.
Measure out 4 cups of mini marshmallows {or a 10oz bag of regular sized}.
Add marshmallows to the melted butter and, over medium heat, melt the marshmallows, stirring occasionally.
{Be sure to taste test the marshmallows to ensure they aren't stale}
Once you've melted the butter and marshmallows together, remove from heat and stir in 6 cups of rice cereal until well incorporated.
 Next, pick your cookie cutter of choice and get a sheet of wax paper, parchment paper, or a silicone mat {a.k.a. non-stick surface} and begin to press some of the somewhat cooled mixture into the cutter shape.
{Lots of taste tests must be made at this juncture... or so my kids seem to think.}
Once well packed, gently push your creation out of the cutter 
{Just because you're able to get in a lick or two at this juncture doesn't mean you need to!}
 
 You can quit here but why would you when the chocolate is next?!
I melted about 1/2 c of dark chocolate chips in the microwave for 15 seconds at a time, stirring in between each interval. Then I scooped the slightly cooled, melted chips down into the corner of a plastic sandwich bag and snipped the corner to make a piping bag.
Since the kids can't do much for this step I gave them the spoon...
Before the chocolate hardened the kids sprinkled them with rainbow dots and then we let them cool completely before sharing them.
{Disclaimer: No licked or tested treats were shared!}

10 January 2012

Rainbow Cake

No... this is not an original idea. 
Yes... it's super easy!
Yes... I'll be making it again! 
I found a recipe on MarthaStewart.com.
I was going for the same look as she had but didn't have the time or energy to make it from scratch like she did and I was not comfortable with putting in the amount of food coloring required to get the vibrancy of colors that she did.
So I made it work with what I had and here's what I ended up with...

I used two boxes of white cake mix and two containers of white frosting.

"Gasp! You mean this isn't made from scratch with your own freshly milled grain?!"

Nope.
I work hard to feed my family healthy, nutritional meals regularly so I don't mind a processed splurge every so often. Otherwise, what's the fun?

Anyway...
two boxes of white cake mix
two containers of white frosting {one of ours was FunFetti}
food coloring
as many cake pans as you can gather
butter and flour/PAM/coconut oil or some other means of greasing your pan

I made up both boxes of cake mix and divided the batter evenly into six bowls {approx 2 cups of batter for each bowl}. One by one, I used the food coloring to dye the batter red, orange {red and yellow}, yellow, green, blue, and purple {red and blue}.
The colors didn't look quite right, especially the red and orange but they all intensified during baking. The red was more of a dark pink, the purple was a lavendar, and the yellow looked nearly white before baking.
Grease the pans well... I used butter and flour... and bake each pan for 15 minutes. Test with a knife/toothpick/spaghetti noodle for doneness.
Once done, let cool for 10 minutes in the pan, then turn out onto a cooling rack and let it cool for another fifteen or more minutes.
Once FULLY COOL, use a long knife, such as a bread knife to cup the tops of the cake level.
{We gave the tops to Mak to eat at her leisure.  What can I say, it was her birthday!}

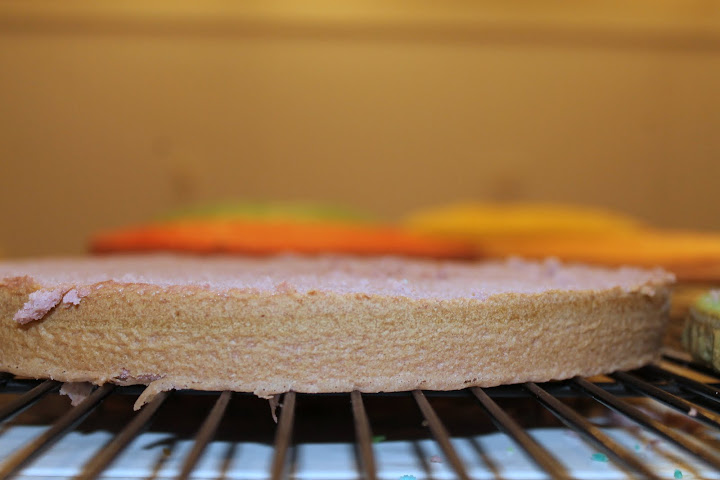
You may notice that the outside of your cake is slightly browned like mine...
Once the cake is frosted, you will not see these edges, just the great colors you've mixed!
I put a VERY thin layer of frosting in between each color. Just enough to make the pieces stick.
It took me one container of frosting to put between the layers then I loosely covered it in plastic wrap and put it in the fridge for 30 minutes. I figured the cake would cut a little easier, be less crumbly, and show the colors better if it was a bit cool.
Then I used one container of frosting for the outside.
I probably could have used one more container but that just sounded CUH-RAZE-EE!
Then I topped it off with some "FunFetti", a quick and cheezy little banner...

really?!...
"Yay Mak!"?
I'm sure I could have come up with better than that!

Anyway... here it is!


or maybe more like "there it went"...
Delicious, fun to look at, and fun to eat!

LinkWithin

Related Posts with Thumbnails