He tends his flock like a shepherd: He gathers the lambs in his arms and carries them close to his heart;
he gently leads those that have young
. {Isaiah 40:11}

Showing posts with label Decor. Show all posts

11 September 2013

Finally! A Favorite!

So if you look to the right... yup, over there... by my picture... you'll see that I noted that I don't have favorites.
Well... that may not be completely true anymore.
My dad has told me on many occasions that
"You don't change as you get older, you just become more of who you already are."
Well apparently I'm getting old because I have finally been able to weed through the huge variety of design styles that I sincerely appreciate and come to THE one!
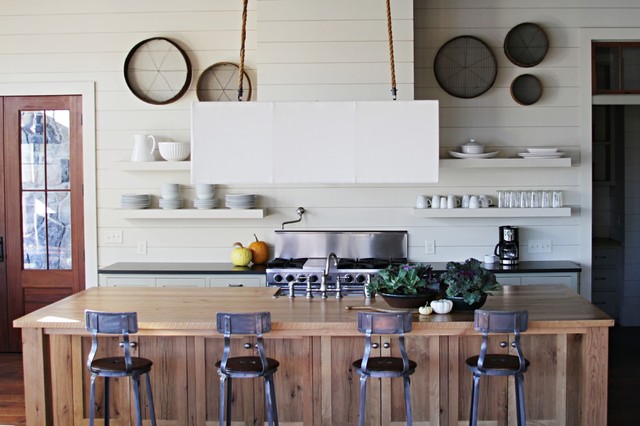
The Modern Farmhouse style is for me! 
I've always had a love for all the individual details that make up this down to earth and practical style.
Actually, its practicality and simplicity are what I love most!
I love that it is always so warm and inviting as if to say "Welcome. You're home now".
I love that it's uncomplicated and straight to the point.
This design style appears to put the most important of things first
...conversation and relationship...
the meal and those with whom you love to share it.
It facilitates experience and is not, in itself, an end but a means to it.
To put it simply, if it makes me wish I was slowly sipping a tall, shimmering glass of iced tea or snuggling with a steaming dark roast coffee... I'm home.
The design  and architecture is all meant to enhance life and not distract from it.
Yes, sometimes there's wallpaper and, yes, sometimes that wallpaper is gorgeous!
It never seems to take itself too seriously.
Occasionally it hints at the industrial...
and often reminds me of a 1930's school room.
Natural finishes are EVERY.WHERE.
...such as black steel roofs, stained wood doors, butcher block, galvanized steel, and leather. Oh my!
There is no shortage of beautifully rich wood floors...
and horizontal boards.
The white may seem boring to some but I adore the crisp, unadulterated ambiance.
It is the neutrality of it all that lends itself, as a host, to any moment you wish to celebrate.
It leaves loads of room for personal style!

I believe that beauty can easily be lost in the noise of most other design styles but in Modern Farmhouse Design it is center stage.
I could stare at these for days! 
So now I ask... what do you think?
Do you think it cold and institutional? Boring and lacking personality?
Maybe it's just right for you? Does it make you long for the rolling hills of Pennsylvania? The fertile valleys of Virginia? The unending plains of Oklahoma?
Oh, sweet Virginia, here I come!


house photo : kitchen island : kitchen island 2 : kitchen island 3entry : screen door : fire pit : dining table : "school room" : back porch : three green pictures :  Christmas Tree : door and shelves : green and teal kitchen : cow : black dresser bathroom : industrial kitchen : outdoor night view

26 August 2013

Becoming A Minimalist: Day 5

Hello
If you're managed to make it this far on this "journey" with me then today just may break your will... but stand strong, my friend. I have taken on this very challenge a couple of times now and have lived to tell the tale. It was actually so rewarding that I am eager to do it again...
That's right, I'm talking about...
Going Through Your Kids Toys!
** If you don't happen to have little mischievous munchkins whose sole purpose seems to be undoing everything you've just done then please, stop reading here... go sit on the couch with a big ol' book and a cup of your favorite beverage and take a nap. While you're at it, take one for me too.**
Now I realize that no matter how many kids you have there's a chance you've kept on top of the clutter. In that case I'm guessing that you've been very selective about the toys that come into and take residence in your home. You may find yourself wondering sometimes what the big deal is and why other moms can't just keep their homes in check. Maybe you own lots of wooden toys, unpainted, unsprayed, carved by hand in Vermont, and have only intentional and lofty purposes such as making all your own art supplies at home, teaching your son or daughter to knit by age 4, and using an abacus made in the USA from 100% recycled-organic-grass fed plastics.(I was like that for about the first week with CJ, my oldest. It was all downhill from there.)
If you're like the rest of us then it's much more likely you have more toys than you'd care to admit. Perhaps you cringe at every birthday and holiday because of pile of loot that your kids come home with and YOU now have to find room for. Maybe you mentally hide certain toys from your kids the second they open particular noise making toys. And I can only assume that you, at least once, have been totally creeped out by said noise-making-toys while picking up late at night, alone by lines like "I see you!". If you're like me, you're tired of picking up the same things over and over again. You literally fly across the room at miraculous speeds just to tear a toy out of your kids' hands because it has too many pieces, your kids are terrible at picking up and you end up doing it, or you HATE the sound of it repeating "Hi! Let's play!" in an unrealistically high pitched and cheery voice over and over and over and...
Yeah.
So if you've experienced any or all of the above it's time to get to it.
I'd like to submit to you that it's not as hard as you may think. At one point, no matter how many toys I gave away, donated, or tossed I had a sneaking suspicion my kids' toys were breeding when we weren't looking as there was always more to filter through. I'm not suggesting that after you begin to get a handle on your kid's toys that this will stop. Things keep sneaking in BUT you'll be able to identify those enemies with stealth speed and deal with before they take over your newly squeaky clean abode.
So enough of my yammering... (must be the lack of sleep talking)...and here we go!

- First and foremost... this is your time to grab a cup of coffee and get cozy because step one begins with some thinking. As I mentioned back at the beginning, it's very important to Remember why you're doing this. This goes back to the original reason of why you're minimizing to begin with. Lorilee Lippincott starts her book off with asking the reader to dream of the life they wish to be living. This is my favorite step of all minimizing. So ask yourself, what is the reason you're doing this? What do you want your home to feel like when you're done? What are your lifestyle goals? Do your goals involve play time? Do you want to make art with your kids? Play sports? Do you mind the noisy toys? Do you want your kids to use more toys that make them think? Do you like down time with video games? No matter what your big picture is... get it clear in your head.

- Now, it's time to make a list, mental or on paper, of what requirements need to be met to keep an item. These can be just about anything but whatever they are, have them speak to your dream home. Maybe this step seems silly but I think it's important for a couple of reasons: 1. You may find yourself more sentimental than you thought you'd be and it may be hard to let things go. 2. If you have a lot to go through, like I did, you may find yourself tired towards the end and stop caring so you throw it into the "I'll figure it out later" pile. Your list of requirements may look a lot different depending on your preferences but if you're feeling stumped... here are a bunch of "if___ than it goes" suggestions to get the ball rolling.

if it's missing pieces...
if it's broken...
if your kids are too old to play with it...
if you never liked it...
if it's from McDonald's and you're not a collector...
if it's made in China... 
if you hate the idea of cleaning it up every time your kids pull it out...
if it's something you won't serve in your own kitchen (pretend food)...
if it has a million pieces and your kids usually pitch a fit when it's time to pick it up...
if you don't have a home for it that makes you happy...
if it's cheap...
if it gives off a chemical odor... 
if it is small and always seems to be on the floor but rarely every played with...
if your kids only play with it for a couple of minute and move on...
if it offers no educational value (sensory, motor skills, math, phonics)...
if it requires no thinking for your kids... 
if, at the end of playing with it, your child can't handle it or starts an argument...
if you know of someone who needs it more...
if you ever find yourself making excuses to others for letting your kids have it... 
if your husband/wife hates it... 
if you refuse to play it with your kids...
if you have a crawling baby who eats everything that's on the floor and it is dangerous to have around...

Really, I could keep going here... but hopefully that gets your wheels turning.

- Okay. Coffee time over. Now it's time to get your hands dirty.
Just as we have done before it's time to get your boxes or bags out. One bin for giving away, one for missing pieces (to go through when it's all over and see if you have collected all the pieces), and one for trash.

- Now... collect all the toys you can get your hands on and put them in a large pile in a very "in-the-way" spot. I find that bringing everything to a central location forces you me deal with the project in one sitting since I don't want a mess left in the middle of the room (I do one pile upstairs and one pile downstairs). Also, I can see everything I'm working with at one time and figure out if pieces are missing. (If time is an issue here than you can always continue picking through a little at a time but today I am highly suggesting this "rip it off like a band-aid" method.)

- If you have a toy or game that doesn't meet any requirements for staying in the house but you still can't let it go, be sure to find a home for it. For example... I loved the game "Mouse Trap" as a kid and found a complete game at a tag sale. I bought it but right now most of our kids are too small to play, rather than keep it out for CJ to request we play with a million times a week, I put the box out of sight in the basement for those special times that Hubs or I are willing and able to play with him.

Maintenance
Okay... now that you have touched every single toy in your home you have much more control over your belongings than you may realize. When Hubs picks up a toy and says "what's this" I can just about always answer and, better yet, pinpoint exactly where it belongs or where the item it goes to currently is. I also know when a toy doesn't belong to us. One of the very best things that happened to me, in regards to toys, is that, after the first round of clearing out, my kiddos took every toy in our living room out and dumped it on the floor and I DIDN'T CARE! It was all mess that I chose to allow in our home and it was all stuff I didn't mind picking up or it was easy enough for the kids to pick up. It was an AMAZING feeling! I also find that our kids are playing with toys that I like seeing them play with more often. We like thinking toys and we have found that our kids have done more thinking since we cleared away the distracting mess.
If you'd like to join me in the fight against kid "stuff" I have a handful tips to continue to maintain the clutter that will continue to try to sneak into your home and undo what you've just done.
- Treat clutter, especially kid clutter, like the enemy and be proactive about keeping it out. It's easy to let an item slip thinking you'll catch it later but, my remember, my friend... kid stuff hides out and breeds! You can't stop it! If need be, keep your list of requirements handy and look it over often. You can also help by creating a line of defense by the main entrance that you and your family use. Arm it with a bin/bag/basket for donating, one for returning (item's you've borrowed or have been left at your house on accident), and one for trash. When we get home from somewhere I do a quick visual sweep of the car. Any small trinkets, toys, wrappers, unnecessary church papers, or "stuff" that we don't want in your home gets tossed then and there. With these bins in our garage, anything that is in our home that shouldn't be now has a place to go right away.

- As I said before deal with all new "stuff" right now. Don't touch things twice. If it needs to be looked over, gone through, or gotten rid of, do it now. Don't waste your time touching it twice. If the time just isn't free, create an obvious, in the way pile, and deal with it as soon as you can.

- When it comes to birthdays and gift giving holidays all of this may get awfully sticky.  Maybe you're a gift giver and you can't help yourself around certain holidays. For those times I hope you can remember your dream home and what it will take to get you there. Maybe instead of buying several small things, save up for one big thing. Also, there are several suggestions out there like "One you want. One you need. One to wear. One to read." The real trick, though, is not what you buy for your family but what others buy. And for this I can only give ideas because each person is tricky and talking gift giving is very personal and you'll have to navigate those waters one individual at a time. With some family we have made wishlists on Amazon for each family member. I especially like this because if there's something we see for the kids in January, we can add it right away and won't forget it by Christmas time. With other family members we have asked that they stop buying gifts for the kids and start taking them on dates. Just today, my sister-in-law, who is an EMT, took CJ to see the new fire truck that just arrived. He got a personal tour of the trucks and and ambulance and got to see the inside! Then they went out for ice cream. I assure you he will remember that experience for a long time to come!

- Occassionally... do the cleaning for them. When the kid has dumped just about every toy out and you know that making them pick it all up will only leads to frustration and tears, volunteer to pick it up yourself. This saves a fight, gets the job done much faster than it would otherwise, gives you a little quiet time, and best of all (for minimizing purposes) you now have the chance to, once again, touch every toy you own and form a bond. That way, you, not your kids, will know when it's time to part ways.

I wish you the best on this one. It's a doozy!


first playroom
orange curtain room
playroom with slide

16 July 2013

Craft Room Update: Painting Laminate


The craft room became our junk room/drop and run room/avoid at all cost room over the past months.
The idea of sitting down to sew something has been laughable since Baby J was born.
I thought for sure I wouldn't dare let our future homeschool room turn into a dump pile and yet....
Every time I passed this room I died a little on the inside.
And then we got a piano.
I had no choice but to move some things around and so our computer, the one I use daily, ended up needing a new home and so classroom/craft room was now also our home office.
I was thankful for the push to get things done and so my first stop was at good ol' Home Depot for paint and primer. 
Several months ago I found this great hutch at my Salvation Army for a whopping $35.
It's hardwood and surprisingly heavy.
I knew as soon as I saw it in the store that I would be painting it but summoning the motivation was tough.
All those nooks and cranies!
And on the left of the hutch you can see the disassembled laminate bookcase I nabbed from my mom who was pitching it.

Painting Laminate:
After a light sanding, two coats of Bullseye 1-2-3 primer, and three to four coats of gloss trim paint, these two pieces were ready for storing.
The room is still unfinished but it's functional. And that's probably how it will remain until another wave of motivation comes along.

I wanted to note....
The laminate bookshelf I painted was falling apart. I think it was mostly because of the flimsy carboard backing that came with the shelf. Using the old back piece as a template, Hubs went out and bought 1/4" underlayment from HD, had it cut to size, and we nailed it in place. The shelves were sturdy like new again. That little fix was well worth NOT buying a whole new book shelf!
All that is to say... keep your eye out for used furniture at tag sales, thrift stores, and in your own home. It almost always costs less than buying new and has always served us well.

The hutch to the left was a thrift store find for $35, the wood shelf on the desk to the right was a tag sale find for $5, the dining table/desk in the middle (which I'm considering painting Fire Engine Red) was a craigslist purchase for $50, and the bookshelf was free from my mom who was throwing it out. Not too shabby if I do say so myself.

15 January 2013

Headboard Done. Here's Some Tips.

I don't know if you happened to notice our headboard-less bed back in this post but after over a year of pillows disappearing over the edge and the morning sun waking me a bit too early in the summer we decided it was time to grow up and get a headboard. I looked on craigslist.org for several months with a couple of prospects but no real winners so once I found this post by Sarah M. Dorsey Designs I gave in and did it myself.
 I was sort of impatient in getting this project done since I had been looking so long with no success so I didn't figure out buttons for the tufting. I'm going to let this simmer for a while until I decide what I want to do anyway.
Since I'm not giving any tutorial on this I figured I would share this with you just so I could point out how simple it was and fast. I put it together in one Sunday afternoon. I'd say it took about 3 hours total. I can't speak for the supplies Sarah used on hers but I can speak to how I made this project less expensive...

WOOD: Sarah uses a larger piece of wood for her headboard that I did. I have a queen sized guest bed I'd like to create another headboard for so I decided to risk being short on wood and had the handy man at Home Depot cut a piece of 1/2" plywood in half for me so that I could squeeze two headboards out of one piece of ply. The final dimensions for our king size headboard were 24"x77". (If you decide to do this on your own, don't use anyone else's measurements. Measure your bed because they can vary.) The board pictured above drops only 2-3 inches below the mattress line but thanks to the sidearms you can't tell. 

FOAM: If you've looked, foam can be crazy expensive. Some of the foam I saw was $60 a yard!!! I was not even close to considering spending that so I went to target and bought myself twin sized egg-crate mattress pad for $13. It wasn't thick enough to get a deep Victorian looking tuft which is good because that's not what I wanted. (

FABRIC: drop cloth. I think it was between $10-$20 at Home Depot. It was just what I needed and the color I wanted.

And that's that.
Happy Tuesday!

04 June 2012

A Quick Fix Chair Recover

Thankfully my mom likes to redecorate often.
She and dad are trying to make their house a little more Mission Style which means that sometimes we get their old furniture.
Yay, us!
Our most recent adoption was a tall kitchen buffet that we put in our living room as a desk.
The one I sit at to talk to you.
This one.
Right here.

Since it's so high we needed bar stools to sit at it so that we didn't stand awkwardly and uncomfortably for long periods of time like we used to at our library computers in college.
"L-U!"
I bought two chairs from the local Christmas Tree Shop but those were constantly being drug into the kitchen as the kids wanted to join me while I worked.
For a couple of months now I've been on the hunt for new ones and finally found a couple of fun ones at a tag sale down the street.
They're the perfect height and rather comfortable but the seat was kinda ugly and dated so I headed to my fabric stash... because why pay?!... and gussied them up just a pinch.
All it took was a hand held staple gun... (I think it was about $15 from the hardware store, maybe less and I've used it for TONS of projects over the years) and some fabric. I used an upholstery weight so it will last through all our wiggling around. 
First unscrewed the seat cover from the bottom of the chair.
Then I laid the fabric face-down on the floor and laid the cushion face-down over it.
I highly recommend working with larger pieces of fabric at first but if you must buy fabric and need to figure out how much you need, or for some reason must cut it before you staple it into place add 3"-4" excess on all sides because you're going to need to be able to grab and pull the fabric taught as you staple.
The key, I've found, to getting crisp corners is to work with little bits at a time and work from the sides of the corner in towards the middle of it. Just keep grabbing small pieces, pulling them, and stapling them when they are tight to the seat.
You're less likely to regret more staples to don't be stingy cause you will regret it if your fabric starts to come loose.
 Cut the excess fabric off about 1/2"-3/4" from the staples and be sure to uncover the holes to screw the seat back into place.
I have considered painting the chairs but to be honest I really like the wood grain on these guys.
Any thoughts?
Happy Monday!

14 February 2012

Wallpaper Removal Extravaganza

I've been busy...
I have just one room left to get the wallpaper off of and I've all but decided to leave it and cover it with wainscoting.
No, seriously.
The past couple have days, when I've been home, have been spent in the downstairs guest bath and the craft room.
I warn you, it's not pretty...
While I was in the middle of all of this mess I couldn't help but thinking that the method I use is the absolute simplest and cheapest way I know. There are other more involved and complicated means to get the paper off but with all the wallpapered rooms I have encountered, stubborn and easy, this is, without a doubt, the best way to remove it so if you have any to get down, please, PUHLEASE give this a shot.
If it doesn't work for you, you've wasted nothing but a little time.
If it works for you you'll be elated at the amount of work and stress you've saved yourself.

Step 1: Using a razor edged scraper, remove the top, vinyl-like layer of the wallpaper.
 
I have used many blades and this one, borrowed from a friend, is by far the best. I am buying the same one after I return this one.

Step 2: Once you've removed the top layer, you'll likely be left with a soft porous paper. Using a spray bottle or sponge, thoroughly soak the paper with water... JUST WATER... a full sheet at a time.
I start with the outer edges first in case any extra glue was put down underneath to keep the edges from curling.
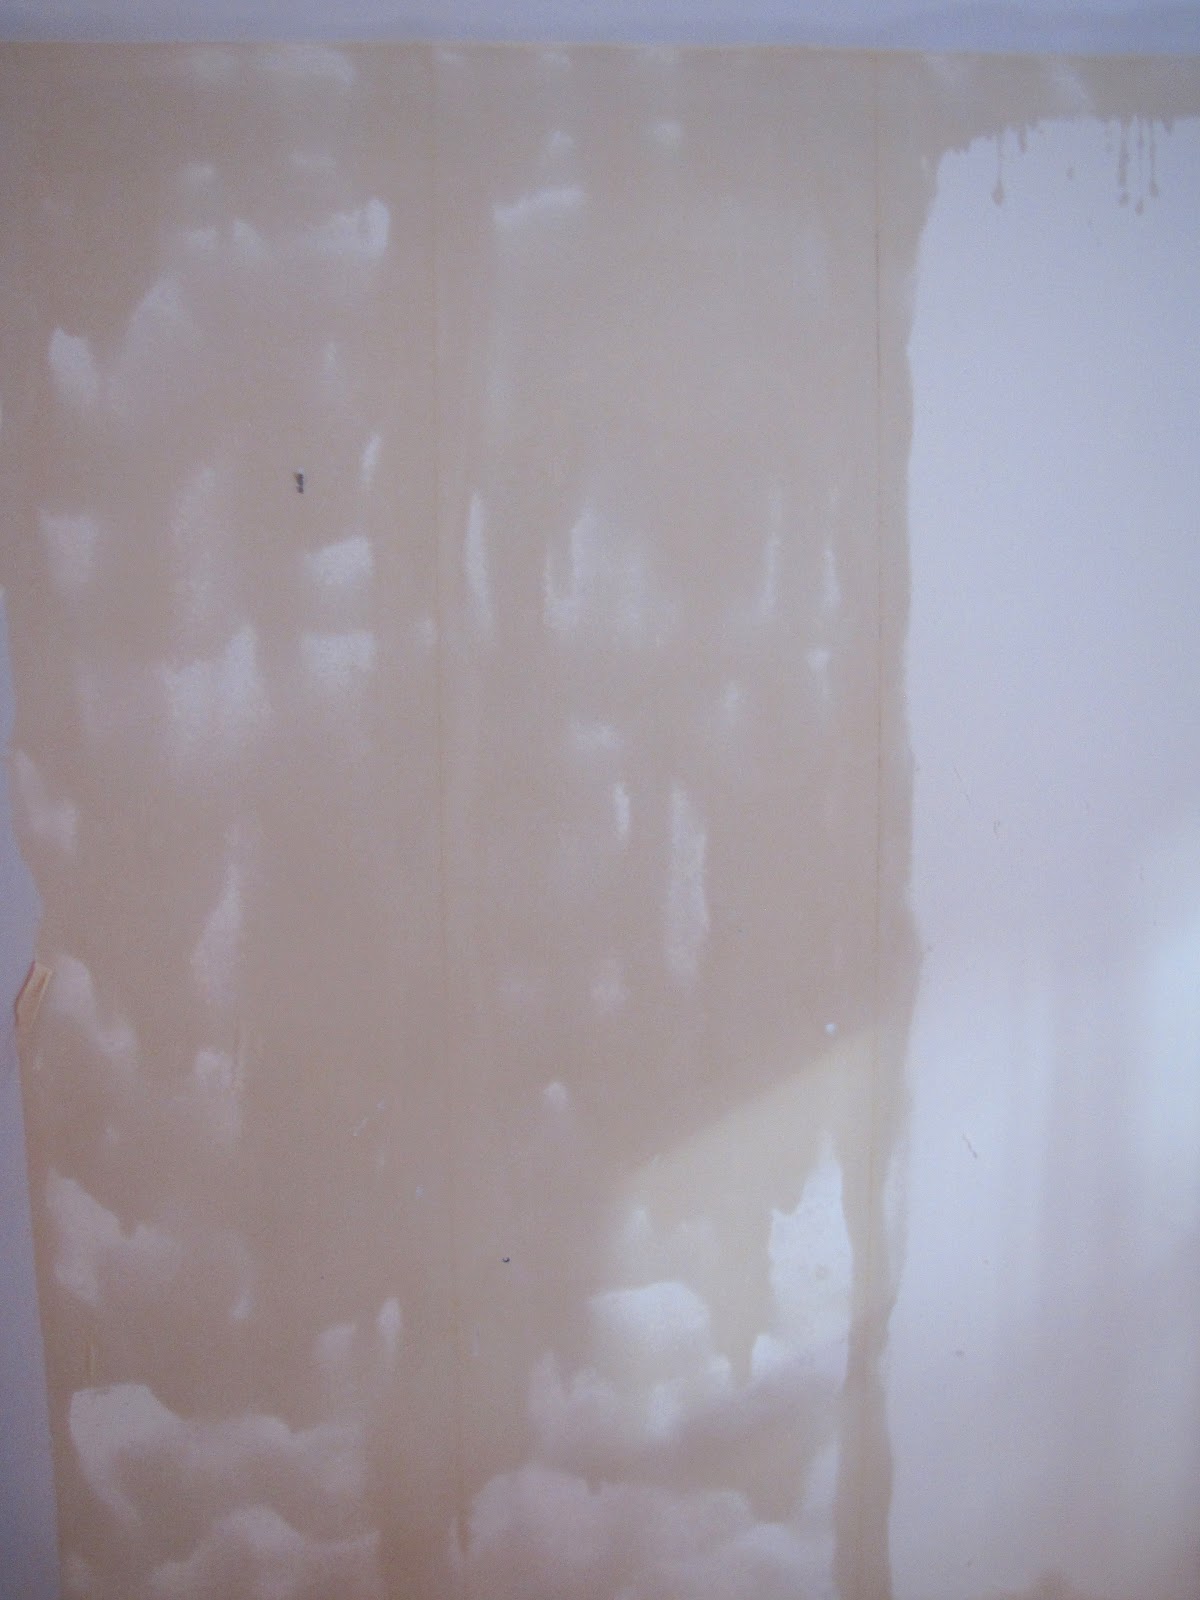
Be sure to thoroughly soak the whole strip so that it is darkened with water and has no patches like the picture above. If you don't soak it, when you begin to pull the paper away, it will tear at the dry spots.

Step 3: Go to the bathroom, check on the kids, make some coffee, whatever you have to do for a solid 5 minutes. Give enough time for the glue to get soft but not so much that it begins to redry. If you wait too long and dry patches begin to reappear, spray them again and wait a few second.

Step 4: Now for the real fun... IF the wall was prepared as it should have been and the paper hasn't been painted over and the paper isn't 100 years old... the paper should fall right off. Use your knife to peel up a corner and then gently, with both hands, begin to slowly peel the paper off.
 
With this method in the rooms I've been working on I've been able to pull of entire sheets in one pull.

Step 5: When the paper's off, if there are spots with extra glue, use the razor to scrape as much off as you can. If it's a lot, you may want to consider priming the wall to get a smooth finish. Otherwise, wipe the whole wall down with a damp cloth and it's ready to paint!

As for me, this is where we are at...
 
and with the in-laws coming in this weekend, I've got some serious work to do!

09 February 2012

Picture Frame Turned Cork Board {Part 1}

I'm from a small town. A small town with a lot of mom and pop shops that I have never visited. I have lived in this area for over 20 years. Shame on me!
Finally, a couple of months ago my sister-in-law, Gigi, and I took an afternoon and started at the edge of town and went down Main St. stopping at every small shop that caught our eye.
I came home with a couple of prizes {ex: large, teal pyrex in mint condition}...
"ain't she pretty?!"
and new found appreciation for small shops.
By the way, I visited a yarn shop not two minutes from my house and though the prices are higher, the selection is amazing, boasting yarn made here in town all the way to yarn from Italy}, and the quality is way beyond what I can find at the big box craft stores around here. Yay for local! 
{But that's another story all together!}
BACK TO THE POINT... 
I also found a lovely shop that sells unique frames!
I have loved interesting picture frames since as far back as I can remember but I've discovered that 1. they are nearly impossible to find and 2. once you find them, they're often pricey.
Boo.
This shop had them on sale for 50% at prices I considered buy-worthy so I snagged these two
Back this summer I visited my favorite cousin ever and saw in her mudroom area that she had a cork board full of pictures of family and friends. As soon as I saw it I knew I wanted one so I have been on a hunt for a good frame just for that and that's precisely what I did... 
Step 1. Wash well to remove dust and oils. There are special cleaners for things like that but I used good ol' soap, water, and lysol wipes.
Step 2. prime and paint. I used a white spray paint to start.
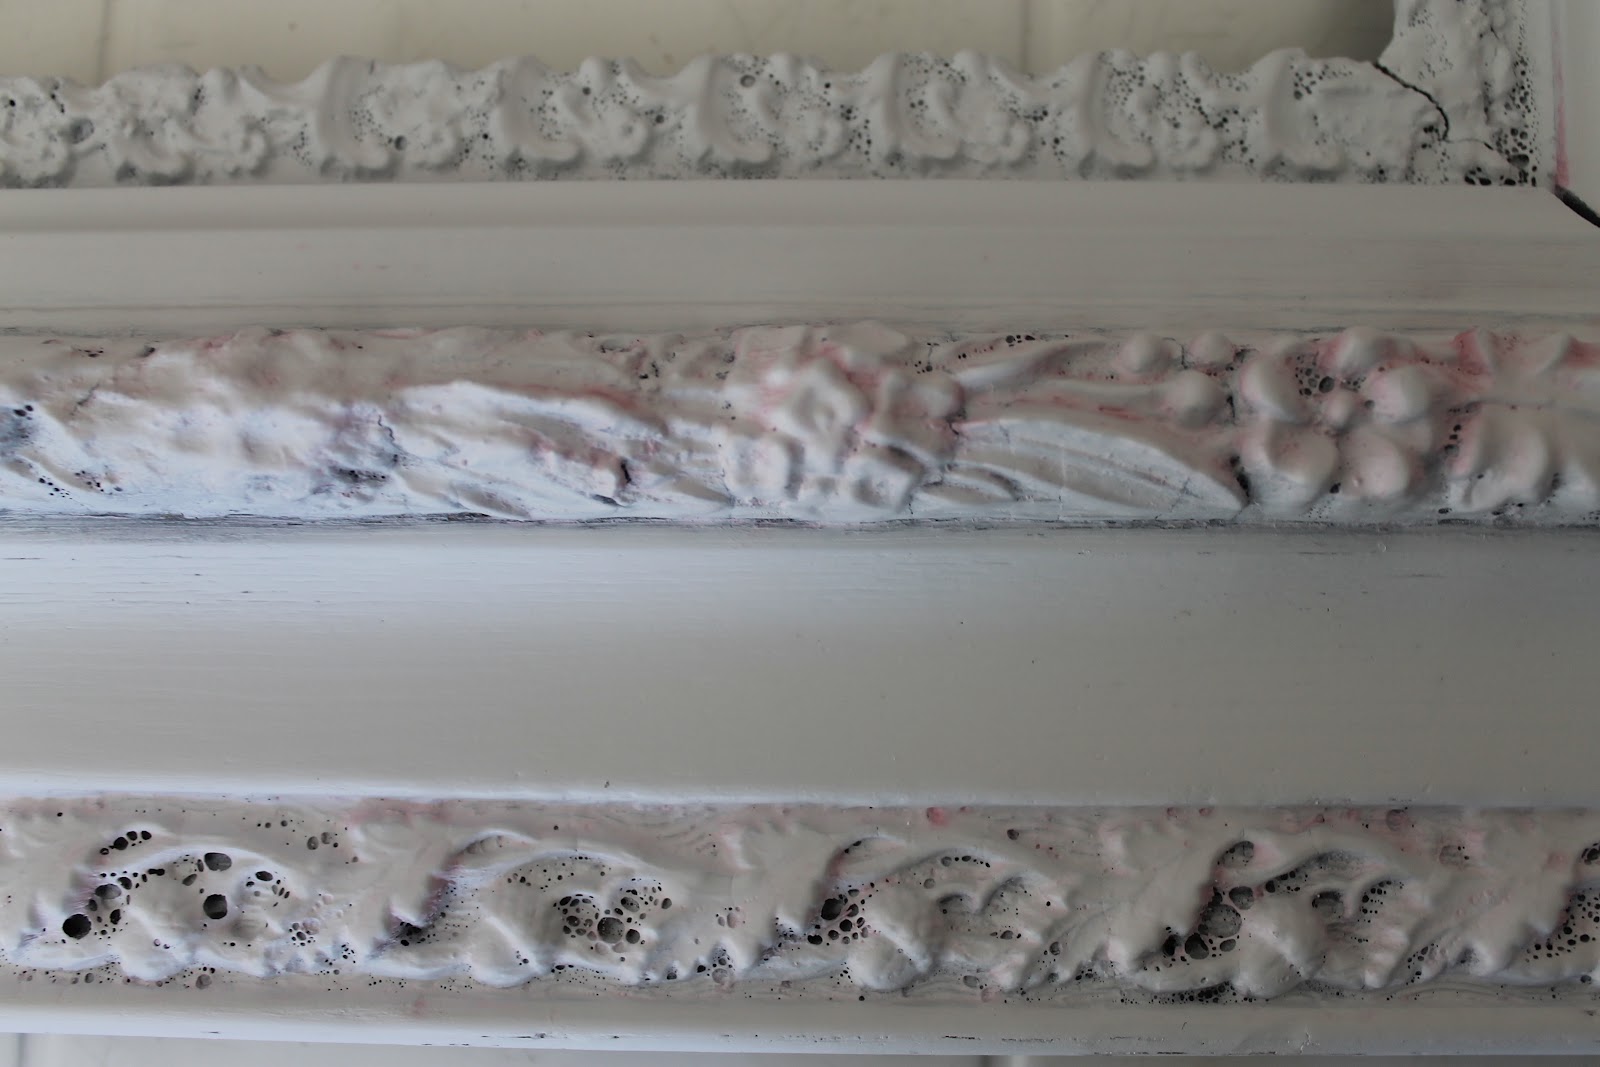
Step 3. Do not... I repeat, DO NOT... spray paint anything pink anywhere near your frame!! If you look closely to the photo above you'll see that I did not heed that advice and after three coats of white it continued to show through. I embraced it... mostly because I had no choice and figured it would add charm.
Step 4. Once it has completely dried, rally your paints and a medium bristled paint brush for some easy aging...
I found that using just one color gave the finish a "chunky", stark look so I gently mixed these two to get a more random finish. I added a little water in some spots as I brushed it on to keep the effect patchy and let the paint sit for just a minute or two. 
Step 5. Using a wet microfiber cloth, I wipes off the excess paint. In some spots the paint stuck nicely into the grooves, in others it just wiped away so I used the cloth to wipe more or less of as I liked. I also over-cleaned in some places and went back with another round of paint and let it sit longer. This step is is very versatile and open to creativity. Since you're washing it off, it's difficult to mess this up. 
Step 6. Let dry and hang. 
This is a temporary hanging for me because I'm going to make this a cork board soon to pin  the pictures up. For now, this is what I've got and even with the pink, I lurv it!

LinkWithin

Related Posts with Thumbnails