He tends his flock like a shepherd: He gathers the lambs in his arms and carries them close to his heart;
he gently leads those that have young
. {Isaiah 40:11}

26 September 2012

Homemade Applesauce (Baked)

There are few things like the smell of cinnamon and apples lingering in the kitchen as apples bake in your oven.

This recipe is super simple and the results are worth every bit of effort required.
Try it!
You won't regret it!
I used to cook my apples on the stove top but during my last round of making sauce I continually burned the apples because I lost track of what I was doing. Baking the apples made them come out perfectly soft and evenly baked every time.
You'll Need: 
Apples, of course! My favorite mix is Macoun and Cortland
Cinnamon (optional)
Nutmeg (optional)

What To Do:
Rinse the apples in large tub of water.
I do this with a sink full of cold water and 1/4 c or so of white vinegar and let the apples sit for about 10 minutes, stirring them up occasionally to make sure they've all been in the vinegar. 
Set oven to 350. 
Core the apples.
There's no need to peel because the skins add natural sweetness and a fun pink color.
Peel if you'd like but if you don't need to... why bother? Of course, if you don't have a food mill or would just rather use a blender, food processor, or potato masher to mash the apples, then peeling is a good idea.
Cut apples into slices. I cut each apple into about six pieces. Remember, this is the easy way!
Place onto a baking sheet
If you'd like, line a sheet pan or other baking dish with foil. I opted to but the apples didn't stick at all so it's not really necessary.
If using, prinkle with cinnamon and nutmeg. I didn't measure, I just eyeballed but I'd guess I used about 2 tsp of cinnamon per pan and about 1/4-1/2 tsp.
 Bake apples for 30-45 minutes.
I used my Roma Food Mill but a traditional food mill works just as well or, like I said before, a blender, food processor, or a potato masher work just fine. Sweet Hubs likes really chunky sauce so I just put the apples in a bowl and stir them with a spoon to get them how he likes them.
And voila!
(old picture, feel free to ignore the label)
Can this, if you'd like. I prefer to put them in quart size mason jars and freeze them when I have the space.
I have recently found it quite handy to put sauce in 4 oz jelly jars and freeze them for the kids' lunch boxes. When I'm packing their lunches I pop them in and as they thaw they act as an ice pack too!

21 September 2012

Problem(s) Solved!

I know that you're just dying to know what's happening with our yard right now <dripping with sarcasm>...
so I will update you promptly on a fairly dramatic change that took about an hour to accomplish and quickly got "out of hand".
Hubs and I have been bothered for a while by the holly bush that seemed to be closing in on our front door. Little bit little, over the past year, we lost our view of the front yard. 

So we chained it to the truck and promptly did away with the problem...
So we thought.
After staring at what was left for a while we decided that the next shrub over looked a bit sad and decided to be done with it as well.
(I'm sure you see where this is going.)
 
We sat back and admired the work only to realize we didn't really like the next remaining bushes either...
and... well you get the idea... 
Ahhh... 
A clean slate. 

Now... what to plant?
Happy Weekend!

18 September 2012

Golden Graham S'mores Squares

I may or may not have made the mistake of going grocery shopping right before lunch the other day.
Keep in mind that I'm in my third trimester and always hungry so this was just a B.A.D. idea.
I bought things that I don't normally buy...
like Golden Grahams, Cinnamon Toast Crunch, and mini donuts.
In the interest of full disclosure I bought 4 boxes of Golden Grahams.
THEY WERE ON SALE, I SWEAR!
So yeah... needless to say that after I ate lunch and my hormone levels began to return to normal I smacked my forehead wondering what I had just done and immediately went to the net to find a way to get rid of these things before Hubs and I ate them all.
Trust me. It would happen. And quickly.

Anyway, here's the goodness that I found and the only thing I wanted to say (other than they're crazy tempting) is that, as a known choco-holic, I'd cut back the chocolate chips to just 1 to 1 1/2 cups.
 Golden Graham S’mores Squares
What You'll Need
1/4 c butter
1 (10.5) oz bag mini marshmallows, plus 2 cups
7 cups Golden Graham cereal
2 milk chocolate chips

What To Do:
Grease 9x9 pan (I used 9x13)
Over low heat, melt butter. Add 10.5 bag of marshmallows (leave the 2 extra cups for later). Stir until melted. Remove from heat and add cereal. Let sit for 2 minutes. Pour in extra 2 cups of marshmallows now and stir in chocolate chips. (They'll get a bit melty at this point so just stir until everything is evenly combined.) Pour into your prepared pan and let cool 15 minutes before cutting into squares.


By the way... this did not stop Hubs and I from eating them all. In fact, we ate more sugar in the end. But as far as snacks go, this was a tasty one and I'll keep it in my back pocket in case I have another weak moment.

17 September 2012

Tag Sale Love!

Tag Sale. Garage Sale. Yard Sale. Rummage Sale. Buying Someone Else's Junk.
Call it what you will.
You can find some great deals if you keep your eyes open, are willing to stop at a place that looks like it only has junk, and take just a minute to actually look at what people are selling.
Today was no excpection.
Every Saturday morning Hubs and I pack up the munchkins and go to our favorite local breakfast place.
On the ten minute drive home we almost always have our eyes peeled for tag sales.
(Well... I do because I love the idea of the unfound treasure and Hubs does because he loves me.)

This weekend the kids and I found a lovely little home who had so much stuff out in the driveway I assumed they were moving. That's usually a great sign. I quickly discovered that this mamma was just dying to get stuff off her hands and, had I pushed her enough, would have likely paid me to take the entire stock off her hands in one fell swoop.THIS, my friends, is the best sign of all. So good, in fact, that I wanted to share my treasure with you as an encouragement to keep your eyes peeled as the fall season comes and tag sales start popping up again.
So let's tally...
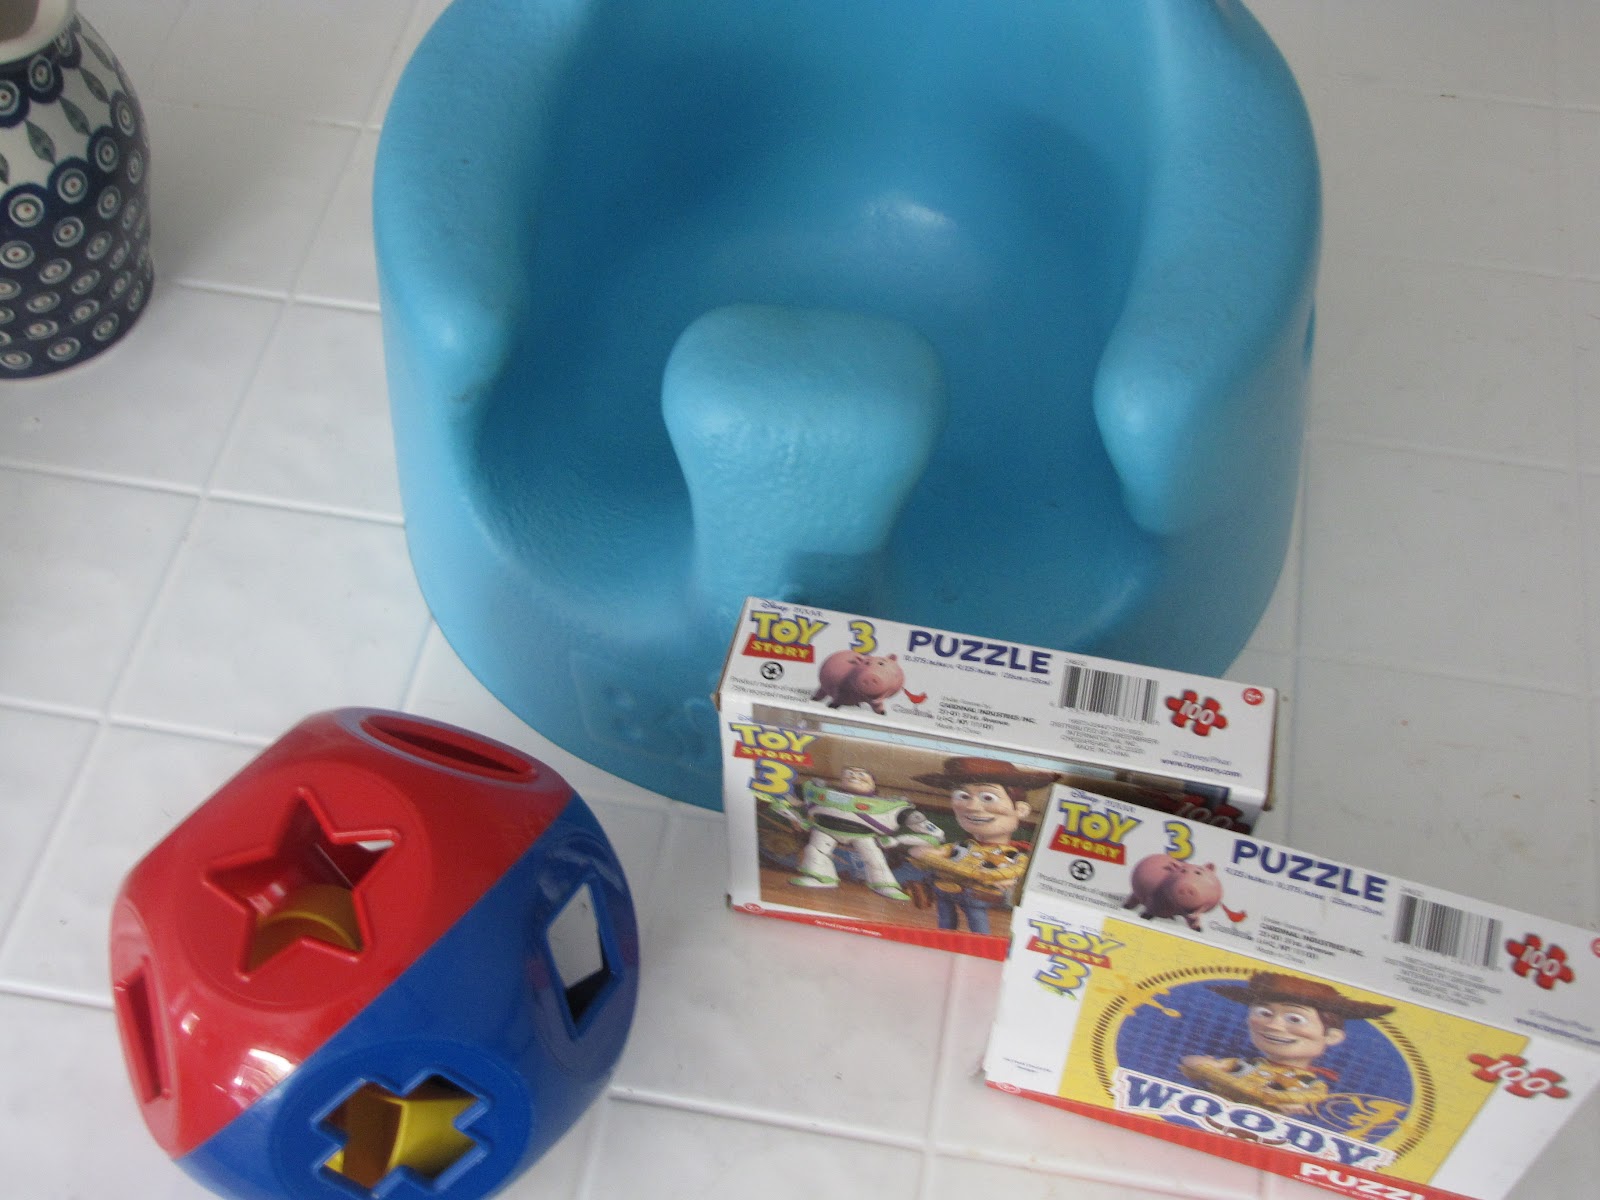
Polish pottery (tea pot, pitcher, casserole dish, two bowls, a square serving dish, creamer, and sugar bowl)
Bumbo for Baby J
Tupperware Shape Ball
2 unopened 100 piece Toy Story puzzles
Total Spent: $22.00 (yes, that's twenty-two point zero zero)

And this wasn't our first great find of the year...

2 booster seats for the car (4 year olds and up) for $5 a piece
Original C9 Christmas lights, enough for the entire house
Vintage glass ornaments for the tree
and don't' forget about the thrift store finds when the tag sales are over...
Remember this? 
I also want to throw out that I think tag sales and things like it can be great for kids!
A few times I have given the kids fifty cents or a dollar to get what they'd like. They learn about the value of money and it's their first step into economics.
Plus, sometimes kids get lucky because they're so darn cute. Miss Mak has walked away with a full sized doll stroller and CJ with several puzzles, games, and a Leap Frog Spanish/English matching game.
I also am partial to sales where the parents give their kids a spot of their own to sell their own items of their choosing and let them pick their prices (which are usually more than fair).

"Tag Saling" is something my mom and I used to do together and I am really excited to have my kids doing it along with me!


13 September 2012

Embracing the Chaos

This is our first week of our new school year schedule. I have been laying low so I can focus on figuring out what I'm in for. My conclusion...
I need some serious organizational plans to make this all happen.
I'm talking prep the night ahead...
Make lunches for the whole family in advance...
Pick out clothes for the week...
have the car packed each night.

Oh boy!

Well... in the midst of the crazy I found this and thought that if anyone is in the same boat as me, now's the perfect time for a little reminder...

Have a beautiful day! 

10 September 2012

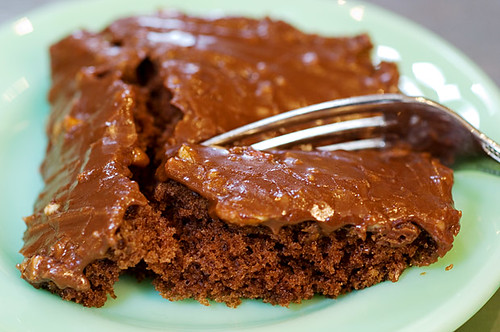
Chocolate Sheet Cake from The Pioneer Woman

Apparently pregnancy has gotten the best of me and the insane baking and sugar intake has kicked in.
This time around, it's Ree's "Best Chocolate Sheet Cake. Ever." that caught my attention.
It's pretty simple, doesn't take too long to make, and I had everything I needed already which is always a plus in my book.

No reinventing here. I'm just going to send you on over to Ree's page and encourage you to give it a shot.
This bad boy makes a lot and cuts up easily like brownies so it's actually ideal for big groups.
Hope you enjoy! 

04 September 2012

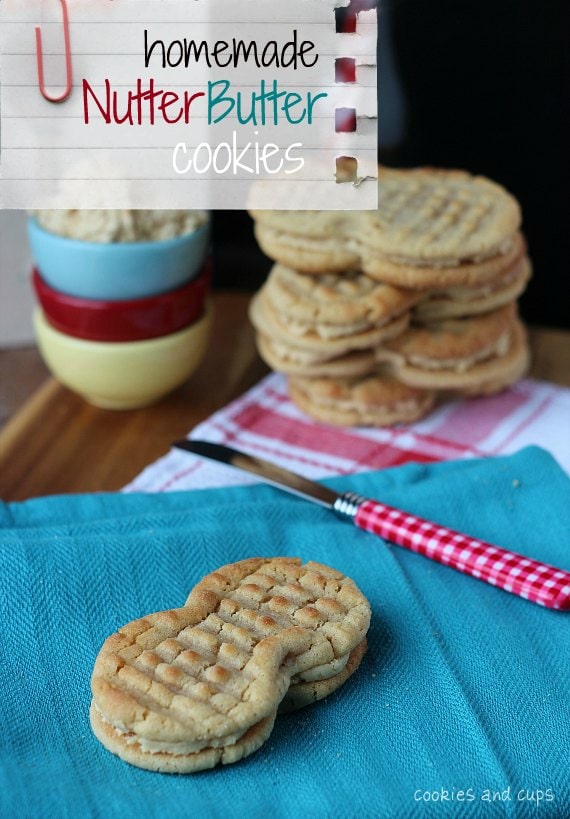
Homemade Nutter Butter Cookies

I made these the other day. You should too. 
Find the recipe at Cookies and Cups and be prepared for tastiness! 
No skimping on sugar here but worth it for a special treat. 
They definitely spread so stick with the 1" ball otherwise you're going to end up with ginormous cookies. (Yes, there are worse things that can happen than huge, yummy cookies.)

31 August 2012

A Few Ideas for Driveway Fun

I'm a New England girl.
We have beautiful sunny days all summer and I have to force myself out of the house to enjoy it but as soon as it hits below 80 you can't keep me in!

So the other night I was trying to find things that would keep the kids entertained outside as dinner time approached and they started to get wrestless.

Enter sidewalk chalk.

I've been working on letter sounds with CJ, letter recognition of lower case letters, and recognizing numbers and decided to make it a "teachable moment".

Though the excitement wore off quicker than I had hoped, I had him on the hook for a little while and used that time to get him moving and see what he knows.
I wrote the letters of the alphabet in a circle and called them out for him to run to and scribble over once he got them right. Next time I'll be more purposeful about mixing up the letter order (I didn't think of that until half way through) and I will only use lower case letters since he's got the upper case down pat.)

We did the same with numbers and now that he seems to be figuring out 6 and 9 we I'll go up to 20 and not just 10.
A friend shared the idea of giving drawing prompts which she found on, where else?, Pinterest and that actually proved to be more fruitful than I expected. It may not look like much but getting CJ to draw without help is incredibly difficult. This time I drew a house and asked him to fill it. He promptly asked me to draw a garage on it. What a guy.

I didn't forget Miss Mak. She is starting to recognize her name when she sees it written so I wrote all of our family member's names on the ground to see if she could pick hers out.

I also gave her gross motor skills a workout by drawing a path on the driveway to see if she could maneuver her tricycle around. I was pleasantly surprised that she managed to stay on it for the most part. I'll make it more challenging next time.

CJ came up with a game of his own too. It's his own version of basketball but he hasvarious strictly adhered to rules and requires that you dribble the ball for at least 5 minutes before you can shoot. Rules or not, this keeps him happy for a while.

Bean, of course, crawls all over the place and, in a very cat-like manner, will occasionally stop and look pretty just for me.
So whether you let them run amok or try to make it a learning experience, the driveway can be lots of fun with just a few basics. 
Happy Weekend!


30 August 2012

Getting Whites Whiter

As I've mentioned before I don't really DO laundry.
I mean, I do laundry but I don't put too much effort into it beyond washing, drying, and sometimes, if my family is lucky, I'll fold it and put it away.

Well, once again, thanks to my random surfing on Pinterest I saw a post about getting your whites whiter and hadn't thought much of it until I looked at a load of whites I recently washed. I had a few new shirts in there and they were crisp and white however they made the rest of the load look kinda shabby and I thought "what the hey?"

I found the original idea on Homemade Mamas who claims the trick is giving the load a soak in dishwasher detergent then running the load a second time with some bleach and regular detergent. I thought dishwasher detergent sounded strange but apparently it's the secret of several laundry lovers so I gave it a whirl and the results aren't half bad.

I won't say my whites came out looking brand spanking new... you can still tell they've been worn before but that dingy gray was gone.
Let's put it this way...
I am and always have been a shoe-hater. I see them as a necessary evil but grew up walking on my parent's gravel driveway barefoot and truly miss those days. So when I wear socks, I tend to ruin them by wearing them out to get the mail, all through the icky kitchen and often into the garage when I need to get something. Sweet Hubs also works at a greenhouse (aka dirt and water facility) where he walks around rooms actually titled "soil rooms" and is surrounded by and walks on a dusty dirty driveway. So getting the dinge out and calling it "whiter" is actually pretty major around here. 

All that said... the recipe is simple...
1/4 cup of dishwashER detergent (NOT dishwashING) in with a load of whites set on hot. Once the washer basin is full of water and begins to circulate a little, stop the load and let it sit for approximately 2 hours. After two hours, resume the cycle and let it finish.
Now you're going to run the load again but this time run it as normal but put about 1/4 c bleach into the dispenser, if your washer has one, or directly into the load. Run the load normally but if you have the option for a second rinse, I recommend using it.
Dry as usual. (For an added boost I dry it out in the sun.)


I have only done this twice and love it. It gets out any mildew smells and sort of restarts yoru whites.
At the very least, I recommend giving it a try and let me know how you like the results.

*Disclaimer: Bleach slowly eats away at your clothes... it's nasty stuff!... so this isn't something you want to do with every load of whites. I'd save it for when you notice the "dinge" returning.
Happy Thursday!

29 August 2012

Kid's Songs that You Won't Hate

If you remember, a long time back I did a post about Scripture put to music for kids. Thanks to the help of some friend I got a bunch of great ideas and picked my favorites.
This time around I wanted to share with you a few more of our family's favorites (meaning the kids love them and Hubs and I actually like them too) and maybe I've mentioned them before but it's because they're just so darn good!

First up... an oldie but a goodie...
Slugs, Bugs, & Lullubies by Randall Goodgame and Andrew Peterson
CJ LOVES "God Made Me" from this album which thankfully YouTube has a link to. Go ahead! Give it a listen.

A new favorite of ours is another in the series of Slugs and Bugs called
Slugs & Bugs Under Where? credited to Randall Goodgame with a bit of input from Andrew Peterson, again.
There are samples of all the songs on this album at The Rabbit Room. Miss Mak's favorites are "Lightning Bug" and "Under Where?"

OH! And there is also A Slugs & Bugs Christmas CD available which has a few fun songs on it as well as some great new Christmas songs.

So... if I'm super convincing and you just can't wait to listen to this goodness and you'd like to save a little cash you can buy the set of three there is a bundle available also at the Rabbit Room HERE.

27 August 2012

Berry Wine Jelly Recipe

I've been canning these days.
The end of the season is usually when I begin to feel the "Oh shoot! I better get canning" feeling.
I've stuck to my two standbys ... Tomato Soup and Peaches...
and branches out to tomato sauce and, one of my favorites, Berry Wine Jelly.

I originally found the recipe for the jelly in the Ball Complete Home Canning Book.
It's very simple, especially when you cheat a little to save time.
The results are a delicious, smooth, sweet strawberry wine flavored jelly.
If this sounds even remotely good to you I highly recommend trying it at least once.

What You'll Need:
1 cup strawberries, stems removed
2 ½ cups dry white wine
3 ½ cups granulated sugar
1 pouch liquid pectin
4 oz canning jars (Ball says the recipe makes 6 jars. I've had once recipe make up to 10 before)

What To Do:
Ball suggests using a potato masher to crush your strawberries... I whipped out the ol' blender.

Threw in the wine and strawberries and pulsed until the strawberries were thoroughly pulverized.
Pour mashed contents into jelly bag or sieve lined with several layers of cheese cloth and let sit over a bowl to drip for an hour.
After an hour pour contents of the bowl into a sauce pan, add sugar, and heat until it no longer stops boiling when stirred
During this step is a good time to get your jars ready for canning by laying them out on the counter and filling them with boiling water.

Once the right boil is reached add liquid pectin and continue to boil, this time stirring constantly for two minutes. Then quickly remove the pan from the stove, skim off the foam with a spoon, dump the hot water out of the jars and fill them with the berry wine leaving 1/4" headspace.

For me... this next step is the trickiest part. Trying to get 4 oz jars to sit in a water bath rack is nearly impossible for me without burning myself and cursing out loud.
a lot.
Because of this I have begun to drop the rack to the bottom before adding the jars and using tongs to place them gently on the bottom.  
Once you've made it past getting the jars in the water, wait for the water to reach a rolling boil again then process for 10 minutes. 

Let cool, store and enjoy!


24 August 2012

Life Binder: Calendars


Today is easy-peasy and requires only a printer to get started...
I did a simple step to get myself started with a smile and found a couple of cute free printables online.
Before I even begin to share what I did I have to tell you that there are about a bazillion options out there. Many free, some on Etsy.com you can buy, many are easy to find on Pinterest.com, and you can use Google if you'd like. Really, the possibilities are endless, especially if you have a basic photo editing program on your computer.

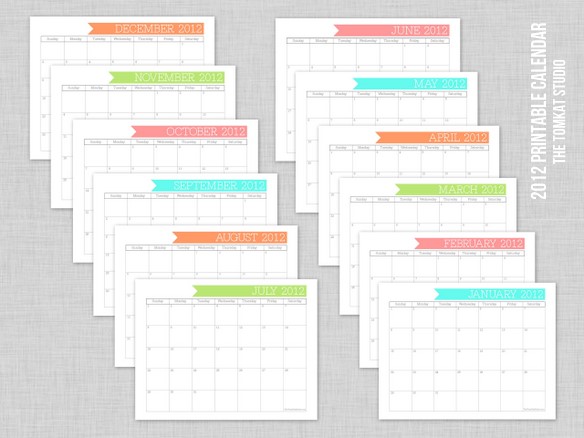
MONTHLY CALENDARS
I used these from "the tomkat studio" for my monthly calendar...
I printed out two copies of these calendars and put them back to back in a sheet protector. The front one is for important dates and events while the one on the back has our month's menu plan.
I take the pages out of the protectors and pencil in new information as it comes and I use a dry erase marker over the plastic to cross off days as I go. 

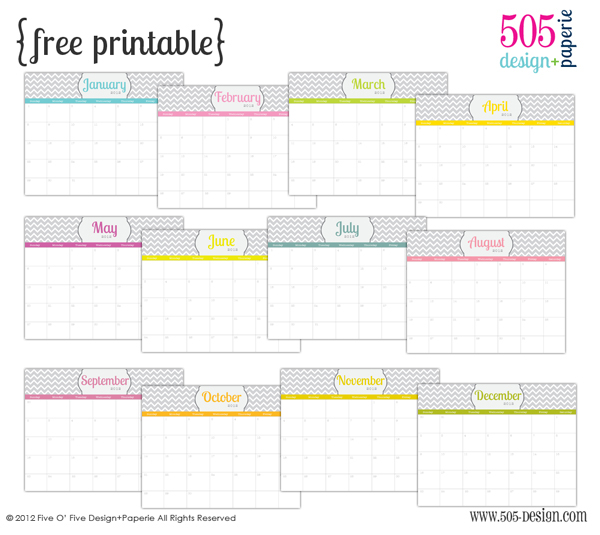
A COUPLE OTHERS...
From 505 Design & Paperie
A blank from Infarrantly Creative


WEEKLY CALENDAR
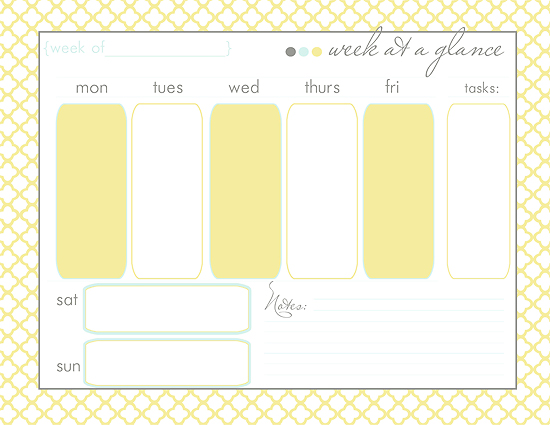
I used this for my weekly calendar from Mommy Tracked...

It has a few details I'm eventually going to change out. For instance, the bottom fifteen boxes say "kids' activities, dinner plans, and notes". I'd rather those be the menu for each meal for each day. I'd also like to change the "to do section" and just create a place to stick a blank sticky note for any items I need to add to my grocery list that way I can just grab it and go and not have to rewrite the list.
I usually write the weekly schedule over the plastic on this page with a dry erase marker because it changes so frequently.


A FEW OTHERS...
From Taylor Gray
From Posts & Pixels
 From Blooming Homestead


DAILY CALENDAR
I don't use one but if you're looking for a daily page there are several options out there too...
From Finding Home under "daily schedule"
From Buttoned Up

 From Sherbert Cafe

LinkWithin

Related Posts with Thumbnails