He tends his flock like a shepherd: He gathers the lambs in his arms and carries them close to his heart;
he gently leads those that have young
. {Isaiah 40:11}

Showing posts with label You Can Make This. Show all posts

24 January 2013

Homemade Catapult


As is often is the case, this is not Krystle original idea. I actually found the link for this guy here at Random Scraps which sent me to Spoonful for directions. I noticed that Spoonful didn't offer any pictures with their directions so I took some pictures as I went in case any of the steps were confusing or if you're a visual person like me. Hope it was worth it for you!
Happy Thursday!


15 January 2013

Headboard Done. Here's Some Tips.

I don't know if you happened to notice our headboard-less bed back in this post but after over a year of pillows disappearing over the edge and the morning sun waking me a bit too early in the summer we decided it was time to grow up and get a headboard. I looked on craigslist.org for several months with a couple of prospects but no real winners so once I found this post by Sarah M. Dorsey Designs I gave in and did it myself.
 I was sort of impatient in getting this project done since I had been looking so long with no success so I didn't figure out buttons for the tufting. I'm going to let this simmer for a while until I decide what I want to do anyway.
Since I'm not giving any tutorial on this I figured I would share this with you just so I could point out how simple it was and fast. I put it together in one Sunday afternoon. I'd say it took about 3 hours total. I can't speak for the supplies Sarah used on hers but I can speak to how I made this project less expensive...

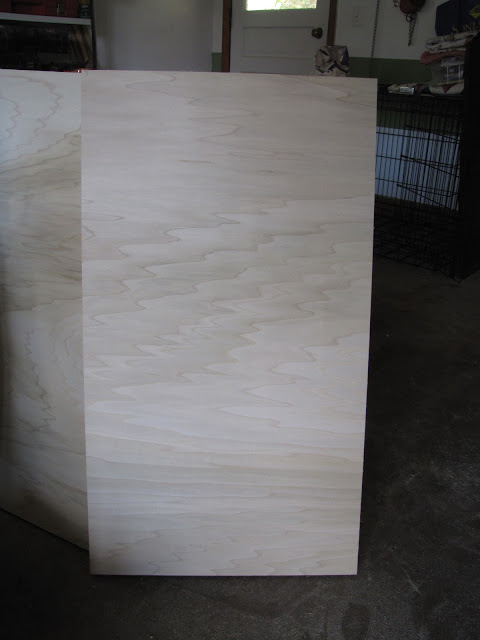
WOOD: Sarah uses a larger piece of wood for her headboard that I did. I have a queen sized guest bed I'd like to create another headboard for so I decided to risk being short on wood and had the handy man at Home Depot cut a piece of 1/2" plywood in half for me so that I could squeeze two headboards out of one piece of ply. The final dimensions for our king size headboard were 24"x77". (If you decide to do this on your own, don't use anyone else's measurements. Measure your bed because they can vary.) The board pictured above drops only 2-3 inches below the mattress line but thanks to the sidearms you can't tell. 

FOAM: If you've looked, foam can be crazy expensive. Some of the foam I saw was $60 a yard!!! I was not even close to considering spending that so I went to target and bought myself twin sized egg-crate mattress pad for $13. It wasn't thick enough to get a deep Victorian looking tuft which is good because that's not what I wanted. (

FABRIC: drop cloth. I think it was between $10-$20 at Home Depot. It was just what I needed and the color I wanted.

And that's that.
Happy Tuesday!

11 January 2013

DIY Building Blocks

Do you remember the cardboard bricks that only the best church nurseries and day cares had?
I loved those things and thought they might be something CJ,  Miss Mak, and Bean would like too.
<enter my inexpensive solution with big impact>
This was the perfect time of year to start our collection as boxes flowed in to our house with the Christmas gifts. Each time the kids opened a gift that came in a box we tested the sturdiness of the box and if it passed the stability test we set it aside to wrap in wood grain contact paper which we purchased from Home Depot for about $7 a roll. The set we ended up with took three rolls of contact paper and we love the result! 
They were easy to put together and the kids love them just like I had hoped. One of the great things about the set we created was that we picked the box sizes we wanted and so we are able to make castles and forts that Hubs and I can fit into with the kids. 
{Miss Mak the princess and CJ the ferocious fire breathing dragon}
{the princess showing the dragon who's boss}
Looking back we should have given this to the kids for Christmas and saved ourselves some work finding other gifts but our pain is your gain as I highly recommend giving this a shot if you have builders in your home. You can start saving boxes now and have a huge stash for next Christmas!  


And... if you're not up for making boxes or don't have access to larger boxes, my sister was able to find sets of 40 for our kids for Christmas from Melissa and Doug. They are smaller but also much sturdier since they have cardboard supports in the middle whereas our boxes are empty and can't have weight put on them and smaller size means easier to store. {Another painful lesson learned.}
Happy Building!


27 November 2012

Inexpensive Closet Update

Hope you had a wonderful Thanksgiving!
Ours was all kinds of relaxing.
We sat on the couch most of the morning watching the parade snuggled up on the couch and then headed to my parent's for a relatively small gathering around their table.
Yum!

So... with another little man in our family, CJ is going to start sharing a room and a closet.
The boys' room is a good size but it's also the room with the best toys and books so it is the room to be in when the kids are upstairs so I wanted to ditch the dresser we have in there as soon as I can. That meant the closet needed an upgrade and thanks to Hubs, some plywood, and a nail gun we got just that.

It started out as a standard closet...
We stripped the closet and mapped out our plan based on the height of the door opening and the duct work on the right hand side.
We decided on half of the closet being shelving and half of it being hanging space including two bars, one for each son.
To get started we measured the height of the laundry basket we use and added about ten inches in case I slack on laundry, which I will. Then we divided the remaining space above the basket to fit five shelves.

Using a 3/4 plywood we cut a side wall do the depth and height we needed (in this case 18" by 72").
Then, we took inexpensive furring strips and cut them to the depths we needed and nailed them into place at the distances we planned.
(You'll notice that we shorted the top two rails. The very top one is short because our top shelf was so close to the top of the door frame that we wanted to be able to access what was up there. The second one down is short because we ran out of furring strips and didn't feel like buying more just for the couple extra inches we needed.)

Hubs then measured the distance of wall we could access behind the duct for the other side supports (13.5") and nailed them into place at the same distances as the shelves on the upright piece of plywood. (If you were making this and didn't have duct work, you'd want to match the length of these side supports to match the ones on your ply.)
 Next we cut five shelves. For us, that meant four 18" x 24" and one 13.5" x 24" (for the top shelf).
Remember that duct work we had to maneuver around? To solve that problem we notched out a corner.
Time to assemble.
Hubs marked the vertical line to where he wanted to attach the side wall for a general guideline.
He then attached the bottom and second shelves by nailing the shelves into the shelf supports.
Ideally we will have supports on the back wall to nail the shelves into as well but we ran out of strips and time so for the moment the side rails are doing all the work.
 The side unit is complete and off to bed we all went....
Day two, Hubs used the wood we stripped from the old closet and cut it to work for the new setup.
For us, that meant cutting a rail to support another shelf above the bars, cutting the shelf as well, and cutting the original bar into two, as well as reusing the screws and brackets to support the bars. 
At the very end, we decided to throw in one more shelf on the bottom left for toys because, as I said, CJ's room is THE place to play.
And there you have it. We are planning to finish the closet with some trim to clean up the edges of the shelving and to paint the whole thing but for now, it's doing it's job and with a 2 week old it's likely to be a while before that happens.
Here's to progress and a wonderful Tuesday!

12 November 2012

Homemade Vapo Rub

I'd been looking for an alternative to store bought vapo rub which all seem to be petroleum (or mineral oil) based.
Why do I skip the petroleum based products? Do a Google search and you'll find plenty of reasons. If nothing else, I figure that when something is strong enough to run my car, it has no business being ingested via lip balm on my lips or sucked in through my biggest organ, my skin. I'm not here to convince anyone of anything. Skipping petroleum is just what we do in our home.
Anyway...

I found this little nugget over at Crunchy Betty and have made it three times already. I love this stuff. It was a big help during the nearly month long virus that overtook the whole family. It tamed the cough, allowed the kids to sleep, and, if nothing else, gave me a peace of mind knowing that there was at least a little something I could do to relieve their discomfort naturally.

The recipe is exactly as Crunchy Betty shares it but to save the trip I'll share it here... 

2 tsp beeswax
1/4 c olive oil (I've made it with grapeseed oil too)
25-35 drops of peppermint essential oil
15 drops of eucalptus oil
10-15 drops rosemary essential oil
{beeswax pellets can be found at most health stores as can the essential oils shown below}
Melt the beeswax and olive oil together in a double boiler.
Stir well with a whisk.

Continue whisking while adding essential oils.
*You may notice that the peppermint smells really strong while adding. Don't be tempted to skimp because of this. The strength of the smell fades as the mixture cools. 
Transfer to small lidded container (in this case a baby food jar)
Store in dry cool place for a year or more (It hasn't lasted that long in our house.)

I HIGHLY recommend giving this a shot in your home because of the number of times it's generally applied when we and our little ones are sick. 
Happy Monday!

05 November 2012

Another Reason to Love Coconut Oil


As if I really needed another reason to love coconut oil.
Seriously.
I have been using it for a few years now.
As a matter of fact I have confused many a newbie with all the ways that I use it.
Off the top of my head...
body and facial moisturizer - makeup remover - diaper rash cream - taken with vitamins to enhance absorption - cooking oil for baking - oil for granola - massage oil- deodorant ingredient - frizz tamer
I promise, I could go on for a while.
Anyway... there are two downsides to coconut oil (hey, nobody's perfect!) BUT WAIT! It's okay... I found one solution...

The first problem is that for as moisturizing as coconut oil is, it doesn't do the trick in the cold winters the way I need. Living in New England means temperatures flux and my skin requires a little more hutzpa than coconut oil can offer. For the winters I often use something like Aveeno or homemade lotion bars a friend gave me which both work great!

The second problem (and the reason we are all gathered here today) is that coconut oil solidifies around 76 degrees F so anything cooler than that and I have to literally scrape it out of the jar or melt it on the stove to use. Not impossible, just annoying.
The solution...
You must whip it!
No additional ingredients are required, it's just like scrambled eggs, to get a great texture you need to add air. And the best part is, we keep our house between 63 and 66 in the winter and so far it's stayed soft and easy to use.
I found the original recipe at The Nourished Life and, as usual, tweaked it a little myself which basically just means that you can tweak it to work for you based on what you have handy. The original recipe can be found here (where the above picture is from) or you can take my word for it that this recipe isn't a science and wing it on your own kind of like I did.

What You'll Need:
coconut oil, no specific amount but I did a little over three cups
shea butter (optional), no specific amount but I probably used 2 tbsp
essential oil (optional), I used 20 drops

What To Do:
Place all ingredients into a large bowl. 
Using a stand or hand mixer, whip the oil for 7-8 minutes until light and fluffy. 
Put into container with lid (we buy shallow plastic dollar store lotions with screw on lids, dump the lotion, clean the containers, remove the labels) and use as needed. 

*the coconut oil does not need to be melted. I used it as a room temperature solid mass however if it's too hard it may do a number on your mixer whisk.

*I used 20 drops of lavendar essential oil because we usually use our coconut as moisturizer right before bed and it is usually calming. if you use yours in the morning then grapefruit would be nice pick-me-up or if you use it as a facial toner then tea tree oil could be good as it is antiseptic. It's really up to you. 


LinkWithin

Related Posts with Thumbnails