It seems as though babies are everywhere these days. Like my sister said, "it's like once you buy a new car, you notice that everyone else has the same one". Once I got pregnant with CJ my eyes were opened to a whole new world of prolific women! Praise the Lord! It's wonderful!
This is also a wonderful thing because it gives me several excuses to sew and who doesn't love that?!
What You'll Need:
1 yard of center square fabric {I usually go for a two tone white or off white}
1/4" yard of 5 coordinating fabrics equaling 1 1/4 yards for the border {see note}
1 1/4 yard backing fabric {I prefer microfiber or Minkie}
Heat n' Bond or Wonder Under {a.k.a. fusible web}
Colored Thread {optional}
How To Do It:
OnE: Cut (1) 30"x30" piece from your center square fabric
Cut 5 1/2" strips from your border fabrics
TwO: Cut your 5 1/2" strips into 9" increments.
Note: if you buy 1/4 yard {9"x45"} of fabric you can cut it as
shown below in 5 1/2" strips OR You can buy a little over 1/4 yard
and cut it as shown in the second illustration}
THrEe: Lay out you border squares into one long row in a pattern you like. Sew your pieces together using 1/4" seam.
FoUr: Iron your seams flat {tip: always iron your seams to the darker fabric otherwise it may show through}
{The following steps are easy to do but hard to explain
so I whipped out my handy-dandy paper and marker
and hopefully that will alleviate, not create, confusion.}
FiVe: Lay your center square right-side-up on your work surface. Starting at one corner of your center square, lay your border fabric right-side-down onto your center square and match up the ends so they're fairly flush. You can clean up your edges after you sew it into place.
Pin into place.
Sew using 1/4" seam.
SiX: Lay your piece flat on your ironing board and press your seams.
SeVeN: Flip your piece over and cut the excess fabric flush with the side of the center square.
So now your top should look like this...
EiGHt: {enter diagram to illustrate next steps}
If you'll notice, you just finished steps one and two.
For steps three through eight you'll do the same thing but this time you'll start your border fabric on the end of the border you just attached {make sense?}.
{If you don't like how the fabrics are lining up you can always shift the border around before pinning it to get the look you like.}
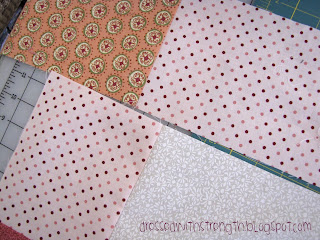
Alrighty! Your top should look like this now.
You could leave it like this. Or,...
You could leave it like this. Or,...
... using this tutorial for applique on shirts, make it personal.
And to finish...
NiNe: Lay out your backing right-side-up on your work surface.
Lay your finished top right-side-down on top of the backing.
Pin around the perimeter to avoid shifting while sewing.
Cut around the edge of your top, leaving an inch or so for "oops"s.
Cut around the edge of your top, leaving an inch or so for "oops"s.
TeN: Sew a 1/4" seam around the edge of your blanket being sure to leave at least a 6" opening somewhere for turning.
After sewing, trim any excess fabric around edges and corners and turn.
EleVeN: Lay flat and top-stitch 1/4"-1/2" from the finished edge.
{If you'd like that added stability, also stitch around the inner portion of the border where it meets the center square.}
The possibilities are endless with this project so have fun!


that is adorable!!!
ReplyDelete